Rdash™ Dash Kit
Installation Instructions
How to Install Rvinyl Dash Kit
Custom Dash Kits really are the ultimate do-it-yourself accessory. When you
want to upgrade, refresh or simply personalize your vehicle's interior there's
no better way than with a custom-designed trim kit made just for you. At Rvinyl,
we've built our company on the notion that nobody can customize your ride better
than you and we've done everything in our power to bring you the best in terms
of selection, affordability, performance and value. So once you've obtained your
Dash Kit, let's begin the installation process for professional level results. You will want to assemble the following
tools before beginning:
- Primer 94
- Squeegee
- Gloves
- Microfiber Towel
- Rapid Prep
- Rapid Clear
- Heat Gun
Installing Dash Kit
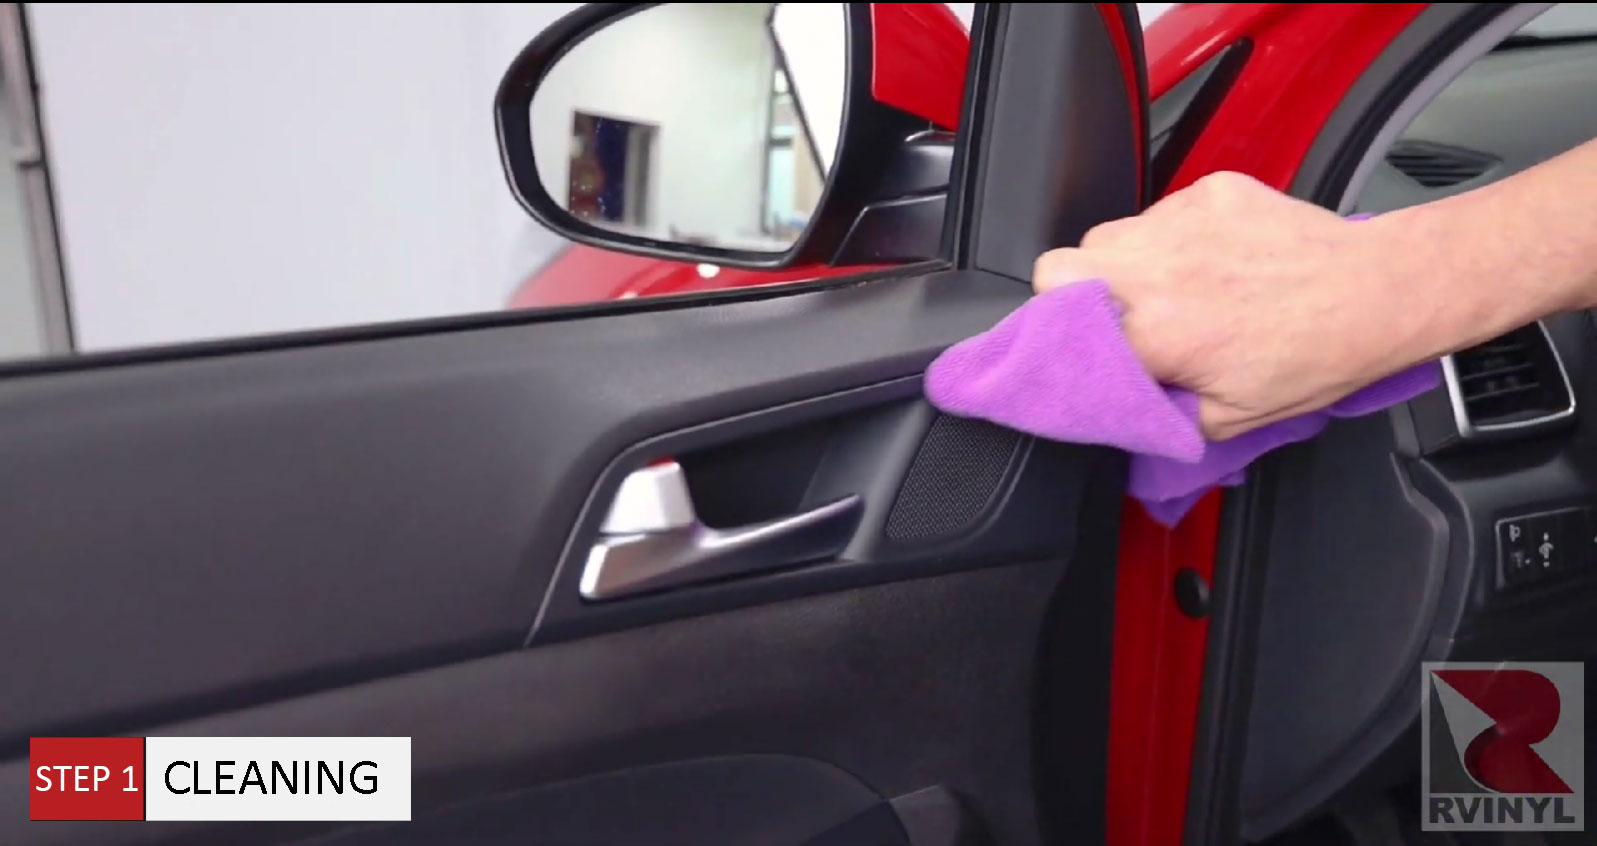
Step 1: Cleaning
Using Rapid Prep and a microfiber towel, spray the Rapid Prep directly on the
microfiber towel and not on the molding. Make sure you clean, super thoroughly,
going from one edge to the other. And once one section is done, continue to
others. Be extra thorough during this process. And if there are recessed areas
and gaps, be sure to dig the microfiber towel in there to remove any tiny specks
of dirt so they don't get behind the material during the install. Also, take the
squeegee in the microfiber towel for tight gaps.
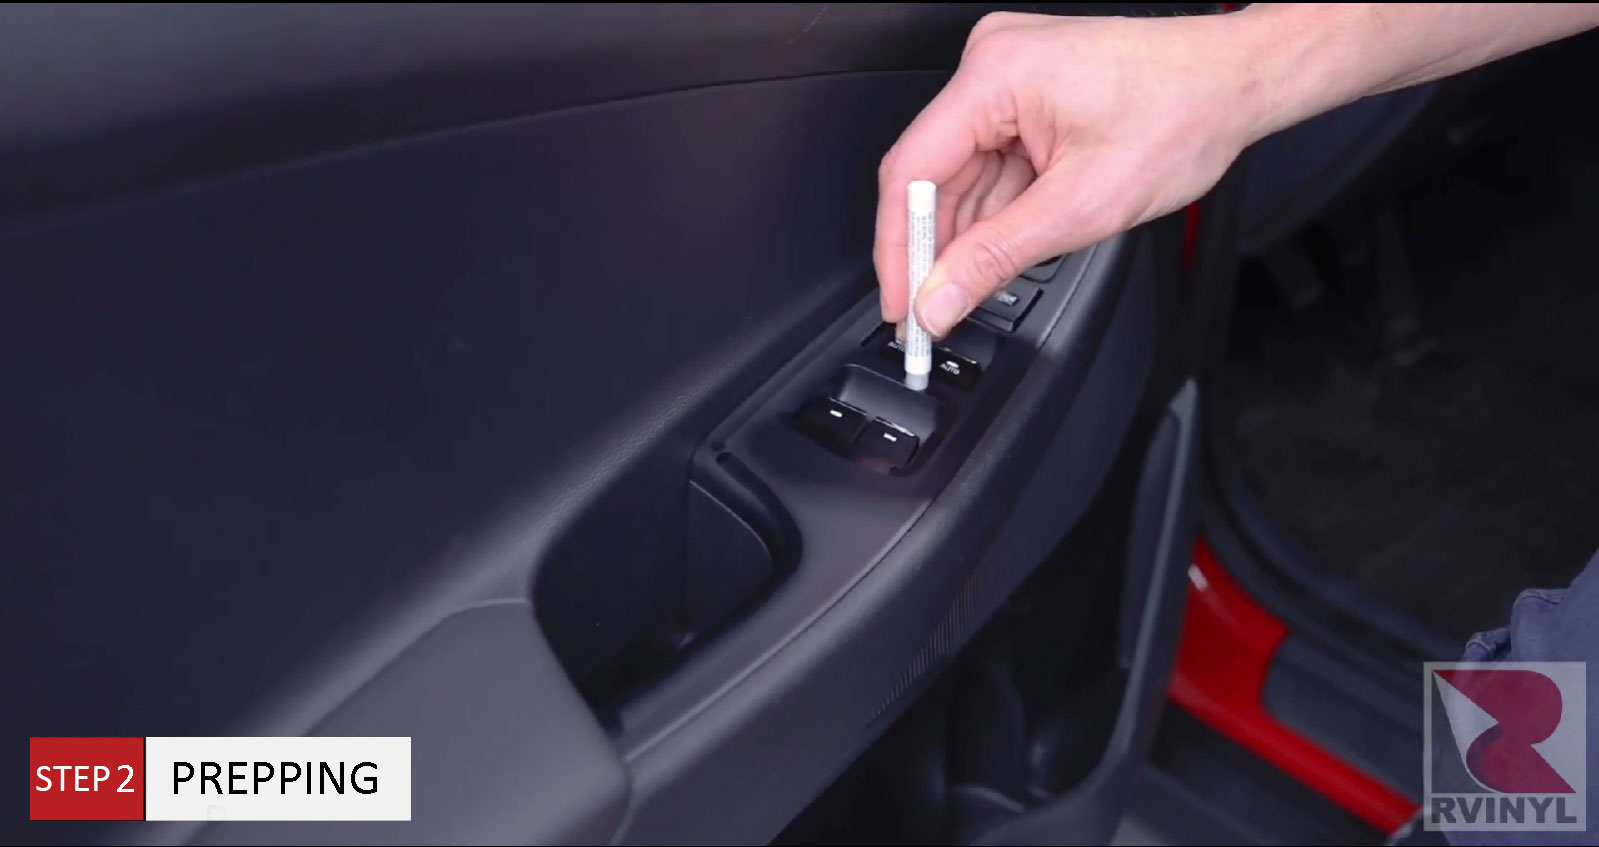
Step 2: Prepping
Now take the stick of Primer 94 and press the button. This will cause it to flow into the
applicator at the tip. Now going from one edge to the other, carefully apply the
Primer 94. Be sure to only put the Primary 94 on the section that's being
wrapped, not on the sections outside it, as this can stain those areas. Be sure
to put a very thin coat and be extra thorough. Primer 94 usually takes between
five and forty five minutes to dry, so always make sure that you apply Primer 94
to all the sections. This gives plenty amount of time to dry and then you can focus on the install.
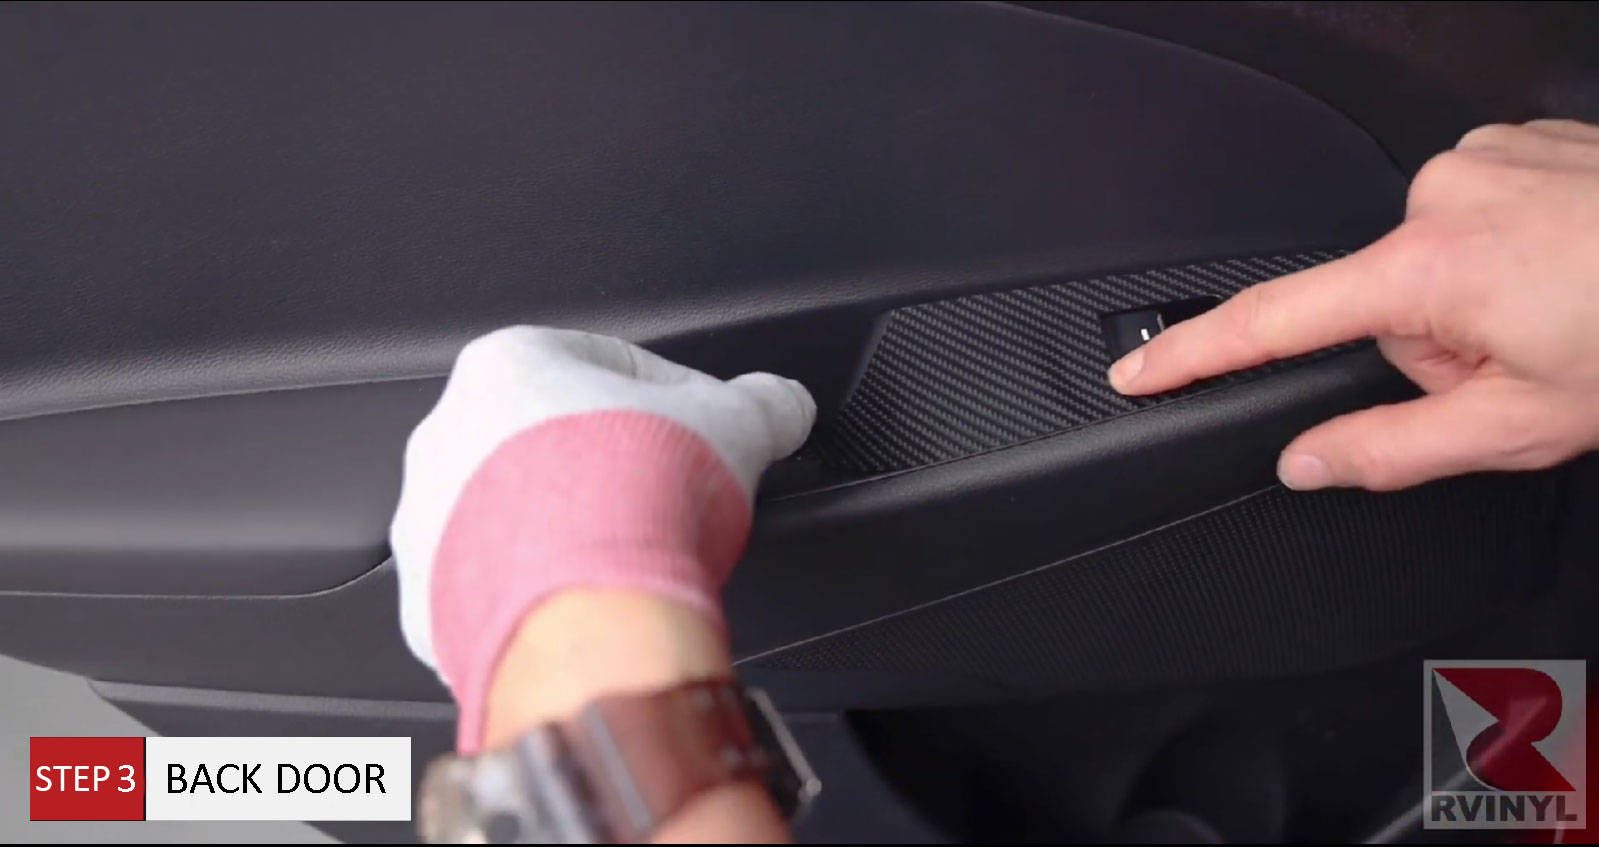
Step 3: Back Door
It's always a good idea to start off with the easiest piece, in this case on
the back door. It's a nice big flat section with only one open gap. Always line
up the open gap first. This will make sure everything else lines up perfectly.
So once that lines up in the middle, make sure the outside edge is good at the
top. Pick the piece back up and make sure it relaxes around the open space. Then
focus on the outside edge. This is where you want to get precise coverage was
this thin piece is lined up perfectly. Then focus on the section in the middle
with your squeegees once everything's down nice and tight run application finger
on the edge. This is where you want to get precise coverage. Once this thin
piece is lined up perfectly, then focus on the section in the middle with your
squeegee. Once everything's down nice and tight, run an application finger on
the edge.
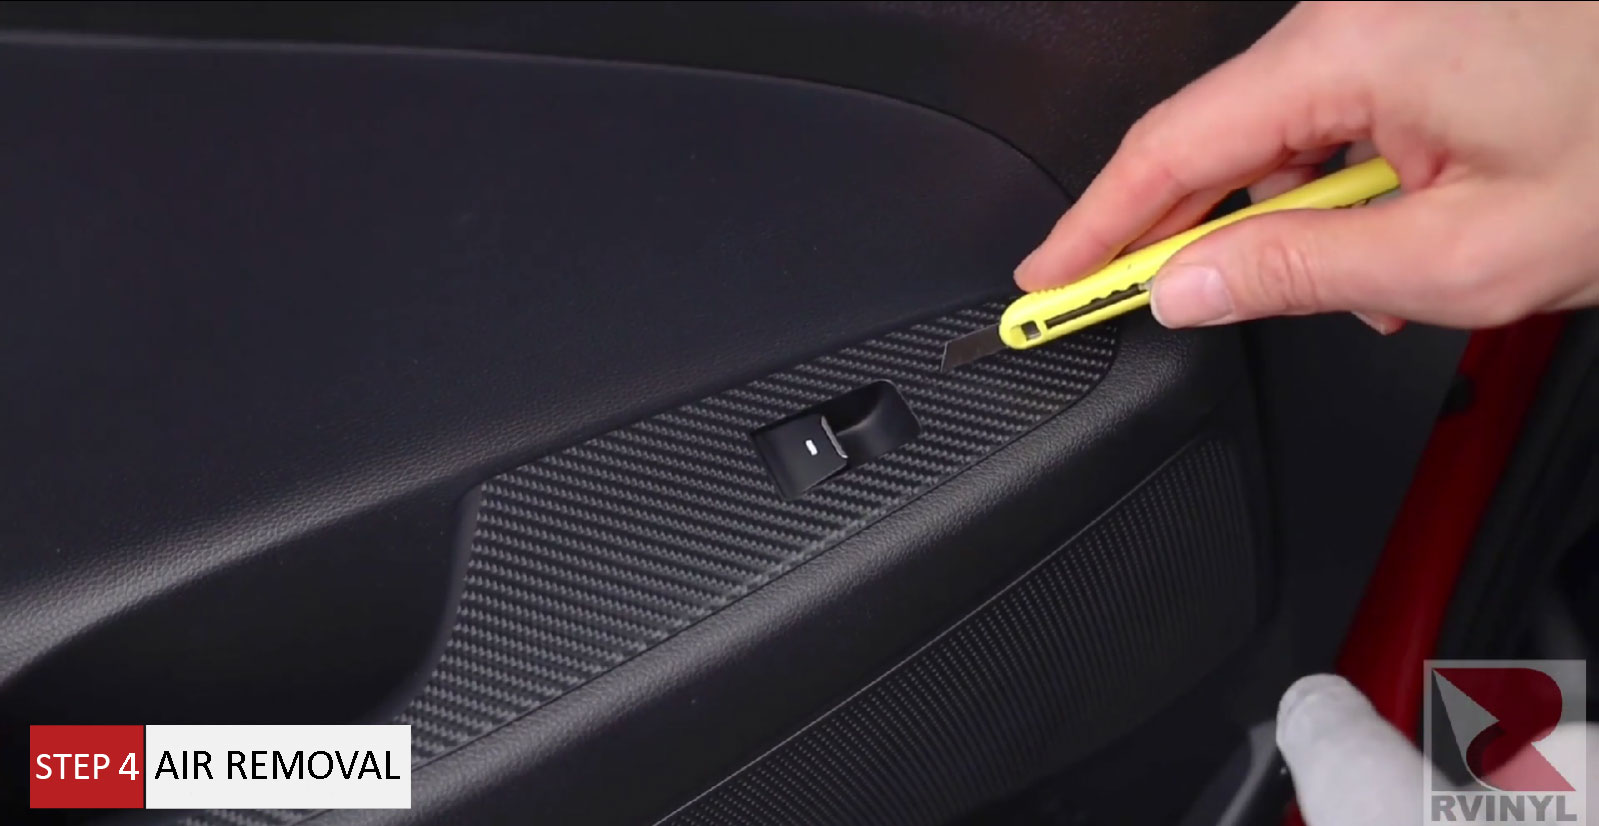
Step 4: Press Air Out
And if there's tiny little bubbles, which is common when you're first
starting out, you can use a knife to poke it lightly and the press the arrow
once all the air is out. Double check the edges and done always correspond the
number to the sheet that comes with the kit to make sure you're using the right
pieces in the right order here.
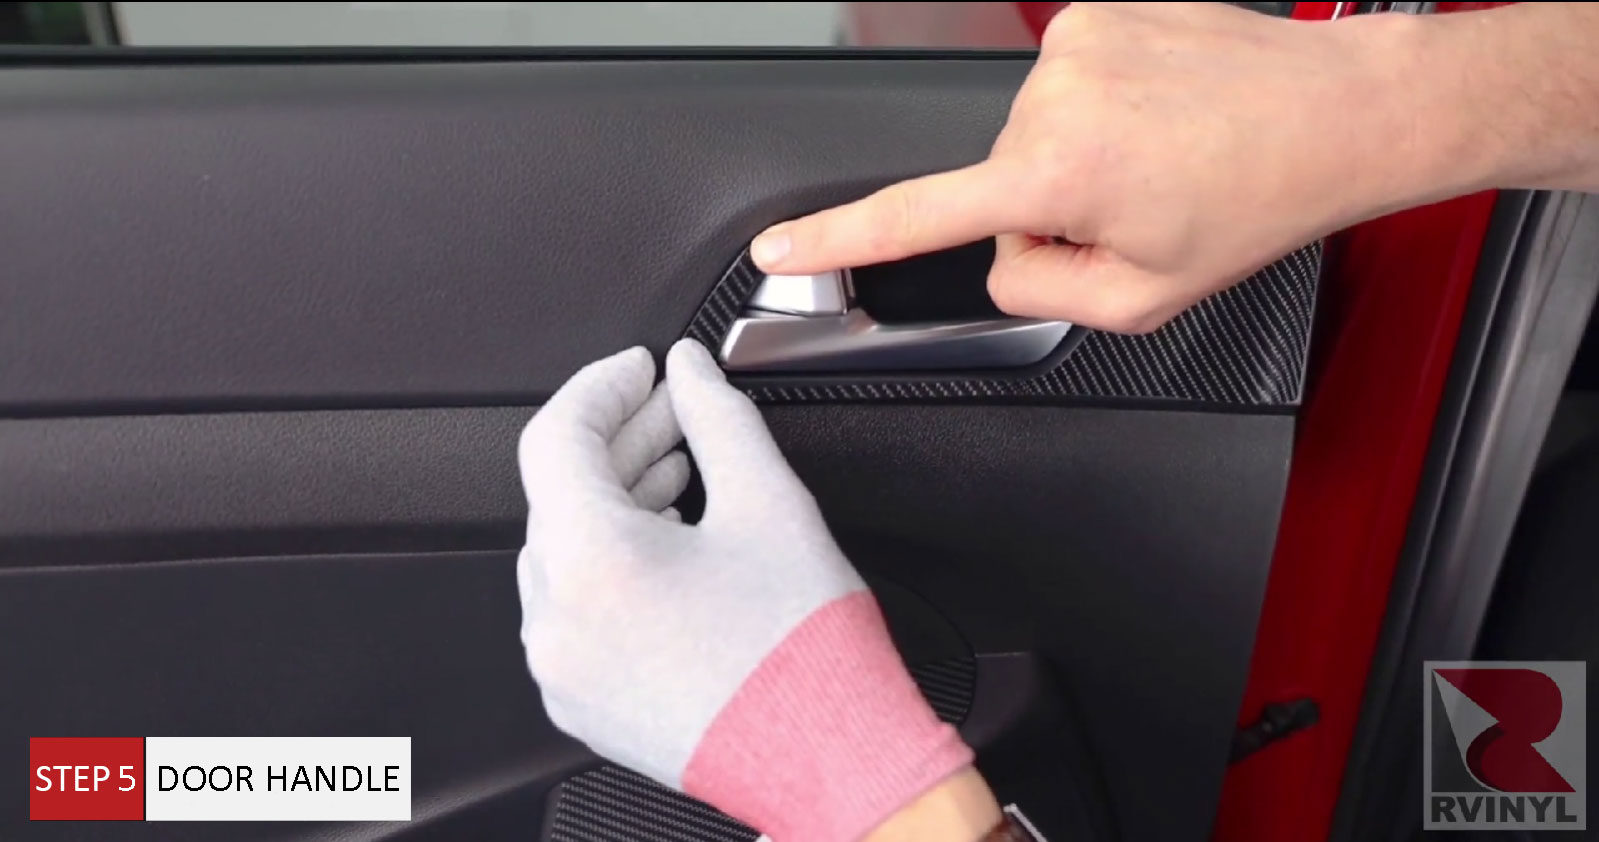
Step 5: Door Handle
Always correspond the number to the sheet that comes with the kit to make sure you're using the right pieces in the right order. Here, this has a thin little section that goes towards the corner, so this can be a little tricky to line up because if you start with a big section and go towards the thin section, it might not line up evenly. So the best tip is now to focus on the thin piece first, line this up perfectly to the corner and to the upper edge. Once this is set, pick the piece up and guide the thin edge along the line horizontal section and align it perfectly. Once that said do the same for the bottom, then focus on the big piece towards the back. This, in many of these cases, is the easiest part to apply. So once that thin section is done and that big giant recessed area, pick the big section up, squeegee it down with the buffer and the squeegee, and you're done. Go around with a finger and seal the deal.
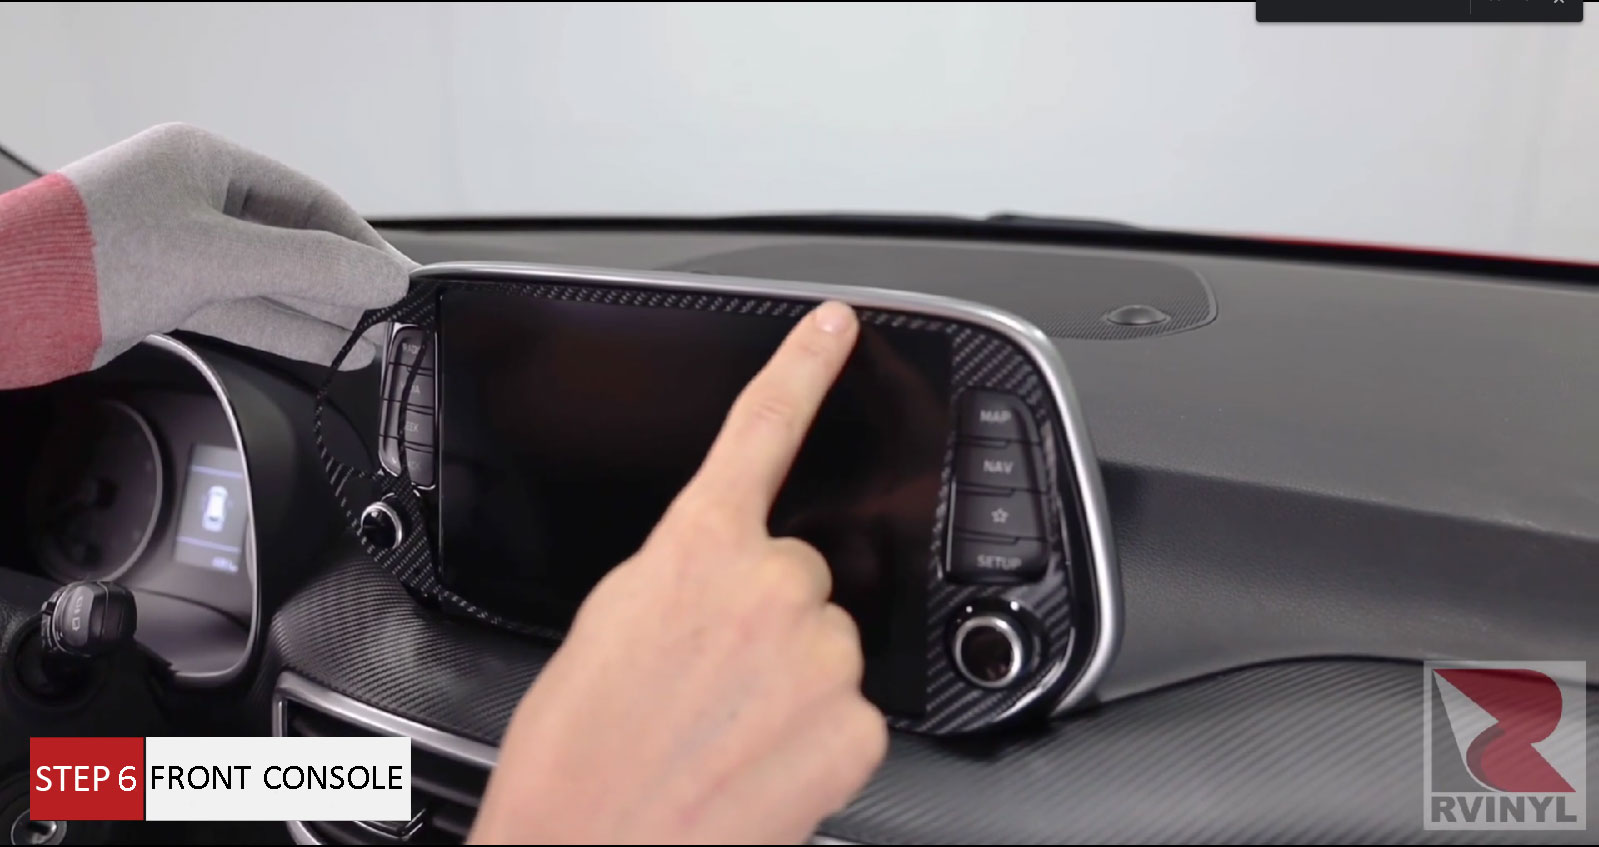
Step 6: Front Console
Now we get to the tricky section at the console, at the front. Again, double
check the number to make sure it's the right one and always start from one
corner and work towards the other. Lightly tack the piece in place to align at
the top tack. Tack the thin horizontal piece lightly in place and if done
correctly, the other side should line up perfectly. Once this is tacked, then
you could focus on the bottom sections. Gently spread the material out so it
lines up evenly, and once the middle section is done, work towards the bottom.
So always work in stages from the top to the middle and then to the bottom, and
once everything is nice and even, a good tip is to come in with a heat gun at a
very light setting just to make sure the edges are conformed and sealed. Be
extra thorough during this process.
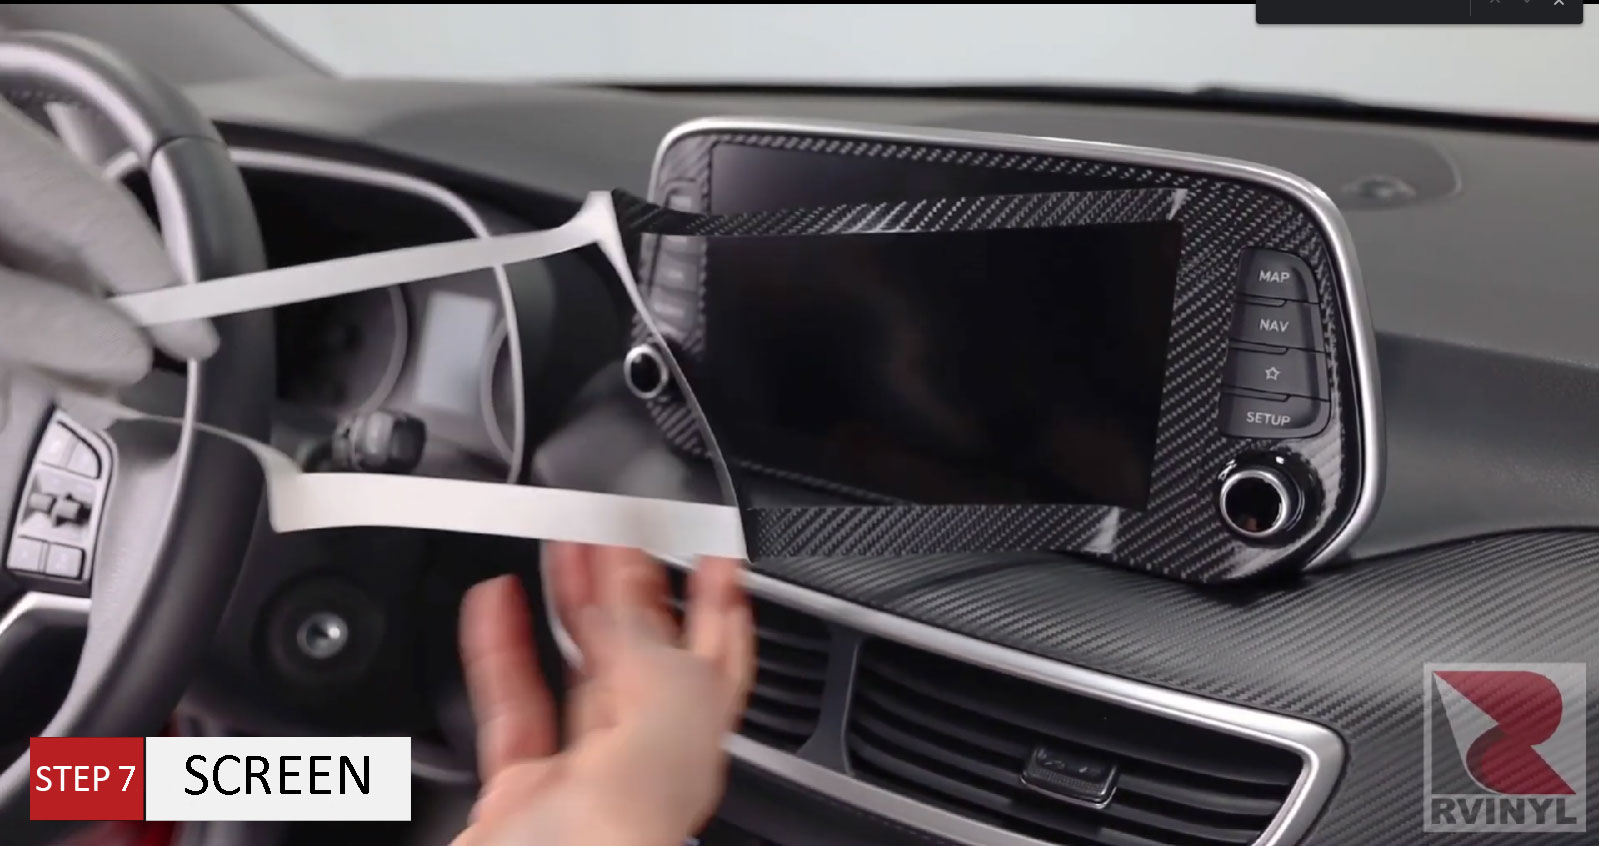
Step 7: Screen
Keep in mind that there are some sections of the Rvinyl Dash kit that come in
multiple pieces in this case, the piece for the screen. Make sure it lines up
evenly and the number corresponds to the overview sheet and keep the liner on
because this has thin sections on all sides. Lineup the piece right to the
corner, on the top and onto the bottom. So this is a vertical setup. Once this
is set now, the entire liner can be removed. Then carefully pick the piece up
and then line it up towards the other corner. If done correctly, everything will
line up perfectly, including, in this case, the carbon print. Now we can move into the top section: here by cutting on the opposite side
alongside the hood that one quarter of an inch excess material is then tucked
into the gap for full coverage and hold on a finger with application glove, then
run a squeegee deep into the gap to seal the edge. Very straightforward.
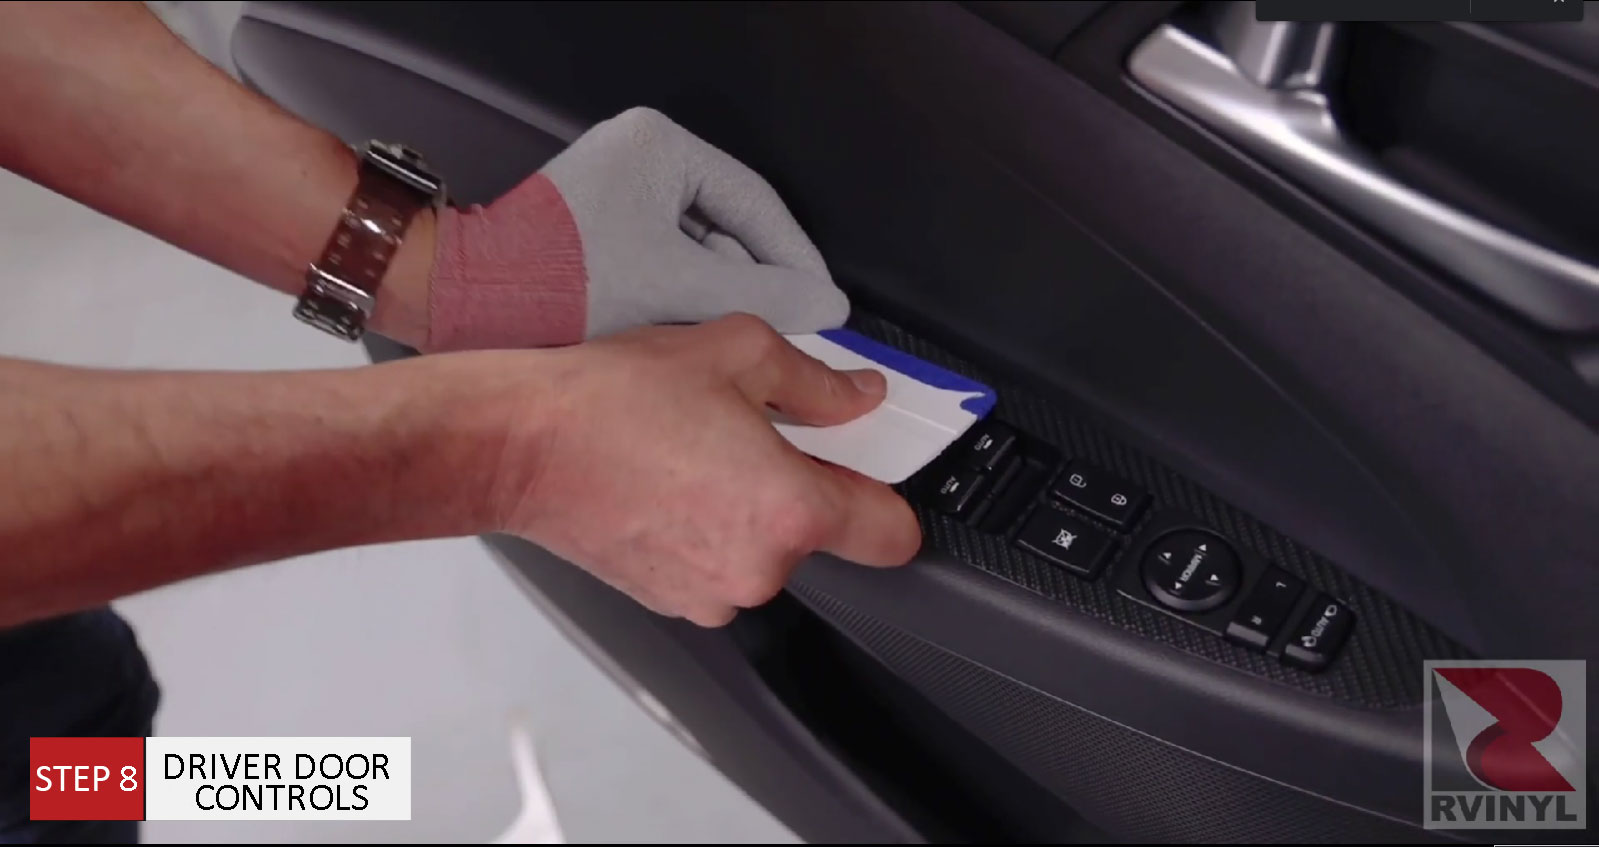
Step 8: Driver Door Controls
Here we have the console for the driver's side door. This section is all
about being patient. Make sure it lines up perfectly at the beginning. Remove a
bit of the liner. Tack it on the upper corner now and then work in increments
towards the back, making sure all the gaps line up perfectly. Once one section
lines up, check in the horizontal section in between the buttons. Then, once
this section is aligned, then works the thin piece along the front edge. The
alignment is perfect, and that means some extra material might come up in the
flood area by the cup. This is not a problem. Take the squeegee now and apply
pressure. Lock everything down nice and tight. Shift some of that tension back
into the middle section there, then pull the material to the back corner where
it lays down nice and flat. Always double check the edge with his finger to make
sure all the edges are sealed during this process. And even though this is being
wrapped on plastic, the combination of the adhesive on the piece and the primary
form will allow it to stick. And that always come in with that light heat to
make sure the adhesive is really sticking on the surface properly, and that all
the edges are 100 percent sealed.
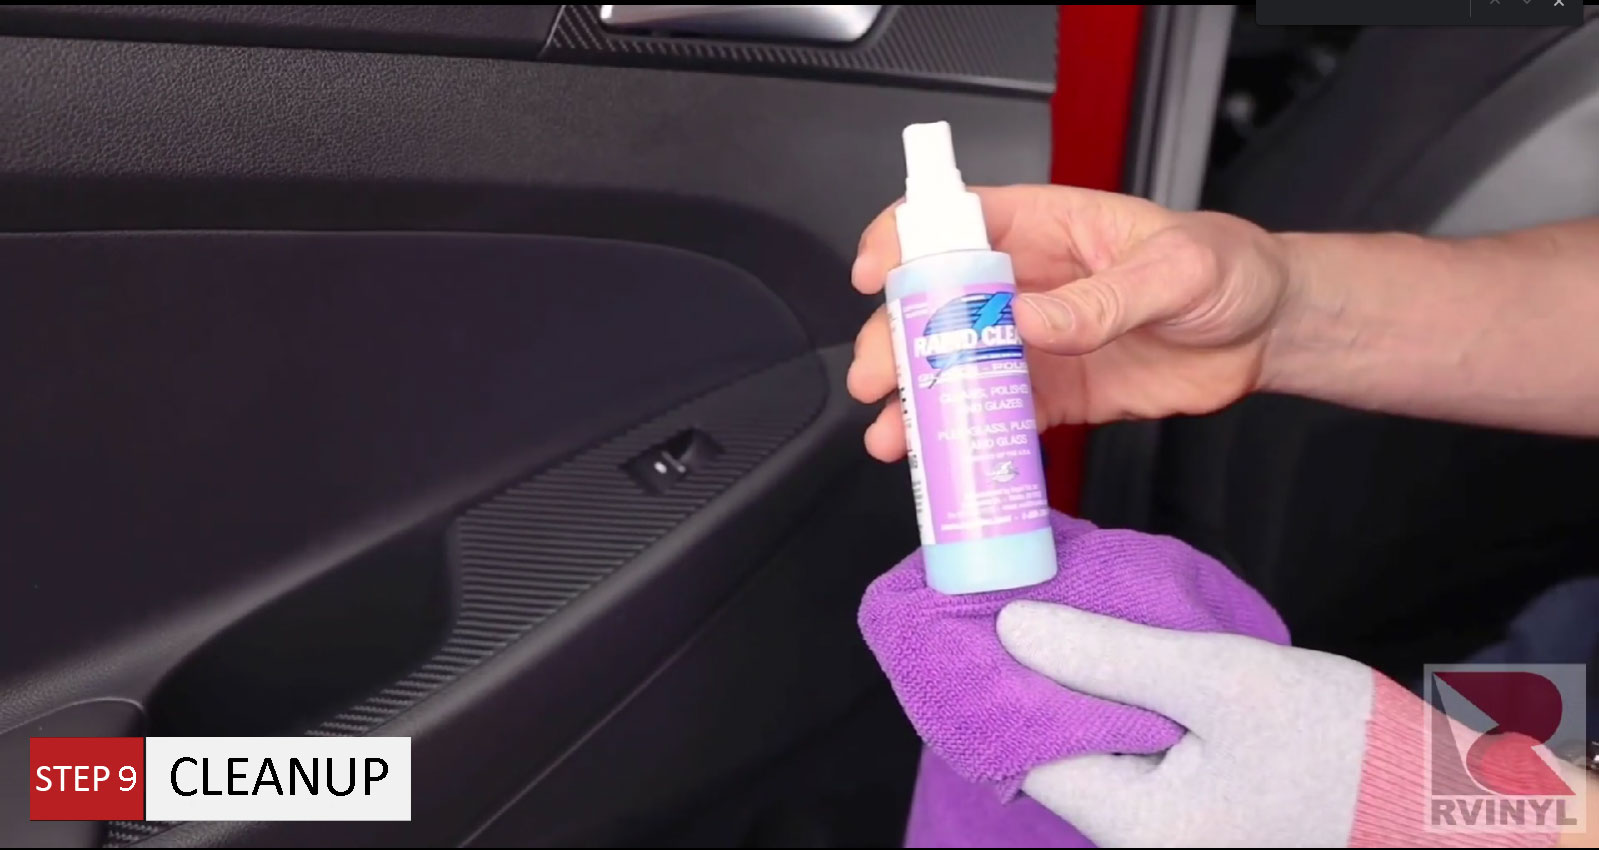
Step 9: Finishing Touches
Now with that, the final step is to take some Rapid Clear and apply it to the
microfiber towel. This will remove any fingerprints from the pieces that were
applied and be sure to clean the areas around the sections just to make sure the
car is looking brand new and extra sharp. So with that now you know all the tips
and tricks on how to properly install pre-cut pieces of film from Rvinyl to
dramatically transform the inside of your car. Enjoy!