How to Wrap Your Vehicle

A vinyl wrap gives you the opportunity to customize any part of your vehicle or even change its appearance entirely with a complete color change wrap. Choose from over two hundred different colors and finishes like Series 1080 Flip, Satin, Matte or Metallic films or Rwraps™ Carbon Fiber, Chrome, Camouflage, Gloss or Brushed films. Made especially for wrapping (unlike sign or craft vinyl films which do not have air-release adhesives), these films are cast so and thermo-formable so they go on smooth around corners and into cracks and crevices without discoloring or deforming. Whatever you choose these installation instructions will guide you through the process and deliver excellent results.

Installation Tips

  • Ideal application temperature range is between 70º to 80º F (21º to 27º C). When possible, turn on your vehicle to aid in increasing the surface temperature such as for a hood wrap.
  • Surfaces must be clean and allowed to dry for 24 hours prior to application. See How to Clean Your Car for Wrapping
  • Clean your areas thoroughly with a solution such as Rapid Clear. Use masking tape to test for adhesion. If masking tape curls up and falls off you need to continue cleaning.
  • Do not apply during periods of high relative humidity (i.e., when it’s raining).
  • Do not bend vinyl film back and forth as this causes the adhesive to wrinkle when applying.

Recommended Tools

  • Razor
  • Heat Gun
  • Squeegee
  • Lint-free Cloth

Table of Contents


Deep Clean Your Ride Before Wrapping

Step 1: Vinyl Wrap Prep and Deep Cleaning

Cleaning your vehicle is of paramount importance when installing vinyl wraps. You'll want to be sure to have a general cleaner, a degreaser, a squeegee and paper towels or a micro-fiber cloth at a minimum before beginning. Once you've got these supplies follow the steps below to properly clean and prepare your ride for vinyl wrap installation:

Bullet Take your vehicle through a car wash (do not use any waxes or protectants) the day before because it allows for complete drying.
Bullet If wheels are shiny that means a silicone-based or oil based protectant has been used which means that it has been splattered along the whole side of the body.
Bullet Always clean your space before attempting to install the wrap. It’s best to sweep and mop before you bring the car into the space, especially in winter due to the electro-static charge of the vinyl wraps that will attract dust.
Bullet Remove hardware and clean it (molding, nozzles, side lights).
Bullet Use a micro-fiber or paper towel folded into quadrants so you can flip it over as it gets dirty.
Bullet Use overlapping strokes when cleaning, clean open doors and edges too.
Bullet Use a general cleaner and a degreaser or an all-in-one.
Bullet After initial cleaning, wrap a squeegee in the towel and dig it into creases and tight areas where your finger can’t reach. Clean under the hood, under the wheel well, clean all of the windows and the entire car.
Bullet Use a clay bar or scratch less sponge.
Bullet Use the “squeaky finger” check. If it squeaks, it's good to go.


Measure the Area You Will Wrap

Step 2: Measuring Your Wrap Application Area

Before you buy your vinyl wrap you need to figure out how much film you'll need for your specific application. Obviously, the amount of vinyl film you'll need to wrap your entire vehicle for a color change wrap will be vastly different than for a partial wrap. Check out how to determine what you'll need for a full or complete wrap below:

Complete Vehicle Wraps

The best way to figure out how much vinyl your car, truck or SUV will need is by using a simple formula. Just multiply the length of your by three (one for each side and the roof, hood and trunk) plus an extra 5 to 10 feet for bumpers, rocker panels, spoilers and mistakes. The following example should help:

Bullet A 2017 Ford Focus is approximately 179 inches in length.
Bullet 179 inches x 3 ~ 45 feet + 10 feet = 55 feet
Bullet Therefore, you would need two 60-inch by 10 yard rolls to completely wrap your Focus.

Partial Vehicle Wraps

In order to measure your application area you will need the following supplies:

Bullet A length of string and a measuring tape or tailor’s tape (this is a measuring tape made from cloth you can purchase at a hobby store).
Bullet A water-soluble marker or Stabilo pencil to mark the string.
Bullet Masking or low-tac tape to hold the string or tailor’s tape in place.

When you measure the surface area to be wrapped you'll need to identify the maximum width and height of the application area such as a hood or dash panel. Tape or hold the end of the string or tape at the farthest end of the area and unroll the string or tape until you reach the opposite end of the area. You may actually end up measuring both the width and depth of the application surface but, because you are going to be using a two-dimensional wrap kit you can treat the surface as if it were a single plane.

If you are using a piece of string or cord to make the measurement mark it with your marker or pencil and lay it out flat on the ground so it may be measure using your measuring tape. Using the same technique employed to measure the width, proceed to measure the height of the area. When you have measured both the width and height you will need to add an additional 2 inches to each dimension in order to provide a surface that can be handled without damaging the film that will be applied to the area. It is extremely important that this step not be skipped because body oils and over-handling are two of the major culprits which lead to delamination, bubbling and improper installation. Looking to wrap your hood, trunk roof or just about any part of your car, truck or SUV? Check out our video series featuring an installation preview of a Honda Civic having its hood wrapped. There are a ton of things you can wrap and when compared with painting and the cost and hassle are substantially less. Whichever Carbon Fiber film you choose 3D with textured finish or glossy 4D Carbon Fiber wraps you can get a uniquely realistic look that will be the envy of your friends and rivals.

Plan Your Vinyl Wrap

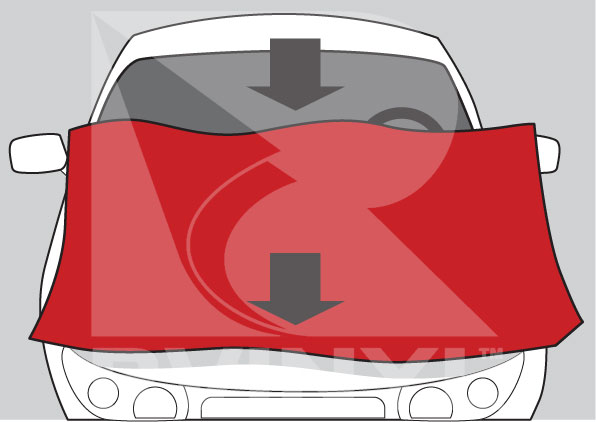
Step 3: Plan Vinyl Wrap Placement

Plan your method of attack. Lay your film (with the liner still on) on the application area to ensure that you have enough wrap for the job. We recommend applying the film to flatter areas first simply because these tend to be easier and more convenient to apply. Check to make sure there is nothing hindering your application, such as logos, hood ornaments, and other bulky objects that won’t be wrapped. We recommend researching how these objects stick to the car and the best method to remove them.

Roughly Trim Your Vinyl Wrap to Size

Step 4: Trim the Vinyl Wrap Roughly to Size

Unroll the desired amount of film and cut it using a utility knife or pair of scissors. Try not to unroll or place the film on the floor, as this will leave dust and debris on the film, causing scratches when applying with a squeegee.
Partially Remove Liner from Wrap

Step 5: Partially Remove Liner from Vinyl

With someone helping you, carefully remove the backing paper while applying some tension to the film, so that less creases appear. Have that person help you position the vinyl and drape the film over the panel. At this point, ensure that the entire panel is covered without any edges of the panel exposed. When placing vinyl on moderately curved surfaces, carefully reposition the vinyl in order to create tension over the entire surface.

Tack Down Vinyl Wraps

Step 6: Tack Down the Wrap to the Vehicle

Anchor the film by tacking it down or "kissing it" to a few areas of the application surface that are flat and easy to reach.

Squeegee the Wrap into Place

Step 7: Squeegee the Wrap into Place

Use your squeegee to form film downward over curves. Lift and reposition the film to re-tension it and remove as many ripples as possible. Do not squeegee over any large fingers or ripples. You'll use tension and your heat gun to conform and stretch the vinyl over the application area.

Heat Stretch the Vinyl Wrap

Step 8: Heat and Tension the Vinyl Film

While re-tensioning the film, use a heat gun to stretch the film 2 to 4 percent beyond its unheated size. Be careful not to overheat or over-stretch the film. Apply heat to 8 to 10 inch sections and work slowly towards the edges.
Squeegee Window Tints into Place

Step 9: Cut Away Excess Wrap Vinyl

Cutting requires a new sharp blade or else you will risk tearing the vinyl as opposed to slicing it. Also, trimming takes very steady hands and an attention to detail. Be careful not to cut into the car if you use an Olfa-style knife or use something like a Snitty cutting tool or else you may run the risk of cutting the surface and damaging it.

Wrap Vinyl Around Edges

Step 10: Tuck Under Film

For rounded or sharp edge corners, just heat the vinyl until malleable and warp the vinyl over the corner until the film is almost at its breaking point. Either use your hands to warp over the corner or if the corner is hard to access, just warp it with your squeegee. It might seem intimidating to stretch a vinyl that much, but our vinyls are specifically designed to handle a lot of warping and stretching without damaging the vinyl.

Vehicle Wrap Completed

Step 11: Vehicle Wrapped

Before you stop to enjoy your handiwork, check out our post-heating tips and aftercare instructions.

rvinyl guy