For proper adhesion, clean all surfaces using a 2:1 mixture of water to Isopropyl alcohol or Rapid Prep.
Note: Prior to cleaning test solution in an inconspicuous area.
Use a clean, lint-free cloth to clean the application area. Ensure it is dry and all oils and residues have been removed prior to application.
A good test is to see the surface has been adequately cleaned is to use masking tape to test the surface. If the masking tape sticks to the application surface without peeling up and delaminating then you may proceed. If it does not stick then further cleaning may be necessary.
This is the most important step of the application process so please take the time to prepare the surface as we are not responsible for adhesion problems due to improper surface cleaning
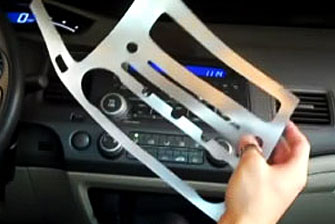
Step 2: Applying Your Dash Kit
Work left to right or vice versa. Do not work from the center out when applying pieces. Be sure not to bridge any areas by sticking the top and bottom and then trying to stick the middle of the kit as this will create air bubbles.
Note: Do not touch or allow dust or dirt to touch the prepared area or the pressure sensitive backed adhesive. Body oils and contaminants will promote delamination.
Note: Do not apply and then reposition the piece as this will promote delamination. Attempt to align the piece and then apply it, if you remove the piece it will not properly adhere.
Step 3: Dash Kit Application Technique
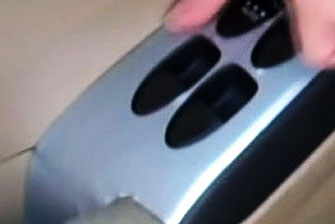
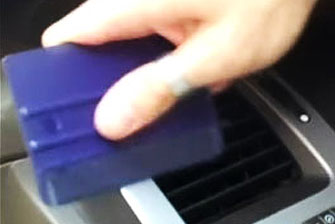
Start at one edge of the dash kit and work through bends using the palm of your hand (rather than your thumb) applying the kit to the surface. Large sections of vinyl may be applied by using a squeegee or other similar object to apply pressure and greatly reduce air bubbles. A hair dryer should be used to help the vinyl to adhere more quickly to the surface and ensure adhesion to areas of the dash which may not be perfectly flat.
Note: Adhesion may be difficult in cold weather, humid areas or if the surface has not been properly cleaned prior to application. The hotter the ambient temperature, the easier for adhesion to take place, but the more difficult it is for the application process. The pieces may become to soft and flexible for easy application.
Step 4: Making Final Adjustments to Your Dash Kit
If large air bubbles are present they may be popped with a pin and gentle pressure may be applied to release trapped air. As the vinyl breathes, small bubbles will gradually dissipate over time.
Allow the kit to cure for 48 hours, trim any extra covered area as desired with razor blade. Pieces may be heated with a hair dryer to insure adhesion and aid in the trimming process.
All aftermarket dash kits are designed to trim or accent the interior of your vehicle and may not entirely cover all areas. These are not replacement dash pieces and as such will only accent the area it is applied to. Rdash kits are the only kits on the market which may be trimmed after application to insure a true custom look.
Trouble-Shooting Tips
When applying your dash kit, please take the time to review the online diagram to insure that you are applying the appropriate piece to the appropriate area of your dash. Rvinyl.com only offers the kits as shown in the diagram, not all pieces may fit all vehicles. We attempt to include as many pieces as possible to fit as many sub-models as possible of your vehicle.
Be patient, applying a vinyl dash kit can be difficult. Take the time necessary to install each piece carefully, if the piece is removed and then reapplied delamination may occur. It is better to trim the kit than it is to remove it and reapply it.
Be sure to have properly cleaned your dash. This is the number one reason for delamination. If aftermarket dash polishes are used, they must be thoroughly removed prior to application.
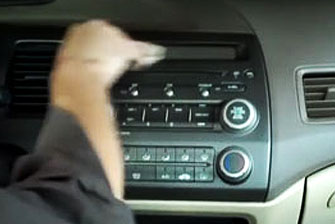
Dash Kit Preparation Guidelines
Please take a moment to read and understand the installation process of your dash kit. If any process is unclear please feel free to contact us.
Ideal application temperature range is 70º to 80º F (21º to 27º C).
Application during periods of high relative humidity is not recommended.
Surfaces must be clean and dry prior to application.