Wrap Your Bike Fork in 7 Easy Steps
Guide
Customizing your bike has never been easier. With Rvinyl, you can give your bike a unique new look and make it feel brand new just like that. Apply some premium quality wraps from Rwraps, 3M, Avery Dennison or ORAFOL. That is why we teamed up with Justin Pate from the Wrap Institute to help show us how to properly wrap a bike frame. Whether you are doing it for the first time or have previously wrapped your bike before, you will feel like a professional with our step by step guide. We have also provided a list of items that will help make the installation easier. For the best possible result, we recommend procuring these tools:
Squeegee
3M Knifeless tape
Seal-It Vinyl Graphic Edge Sealer
Squeegee Friction Sleeve
Rapid Prep
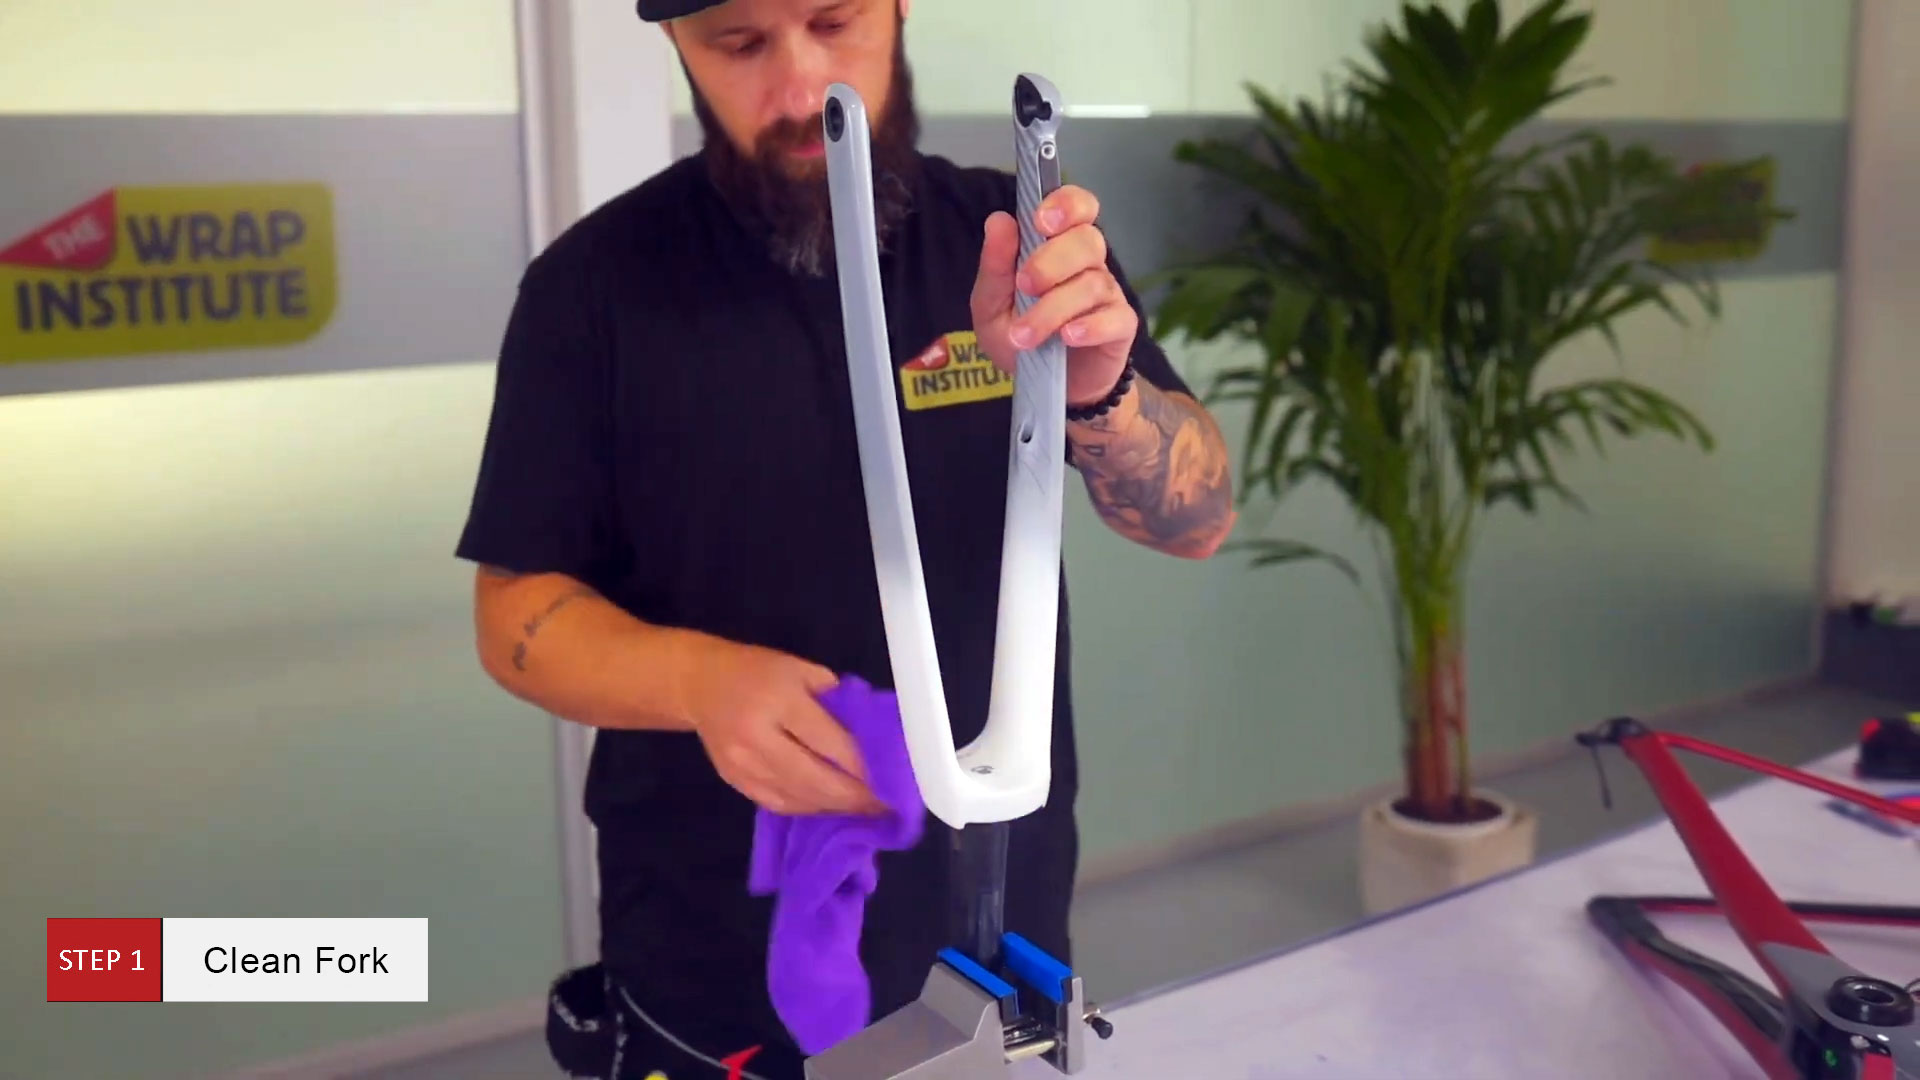
Step 1: Clean the Bike Fork
The first thing you need to do is make sure the bike fork is stable on the table. You should use a vise to secure the bike fork. That will free your hands while also giving you the best possible angles to clean and install the vinyl wrap. Now, clean the bike fork so there isn’t any grease or dirt on it.

Step 2: Wrap the Inside of the Fork
The installation needs to be wrapped on three pieces. Start with the inside of the fork. Place the vinyl in the middle of the fork, starting from the bottom. After you do this, you can press the film on both sides. Make sure to hold the material slightly away from the surface as you make your way to the top. Use a squeegee or your finger, whichever one you feel most comfortable with. As you press down on the vinyl, overlap as you make your way to the top.
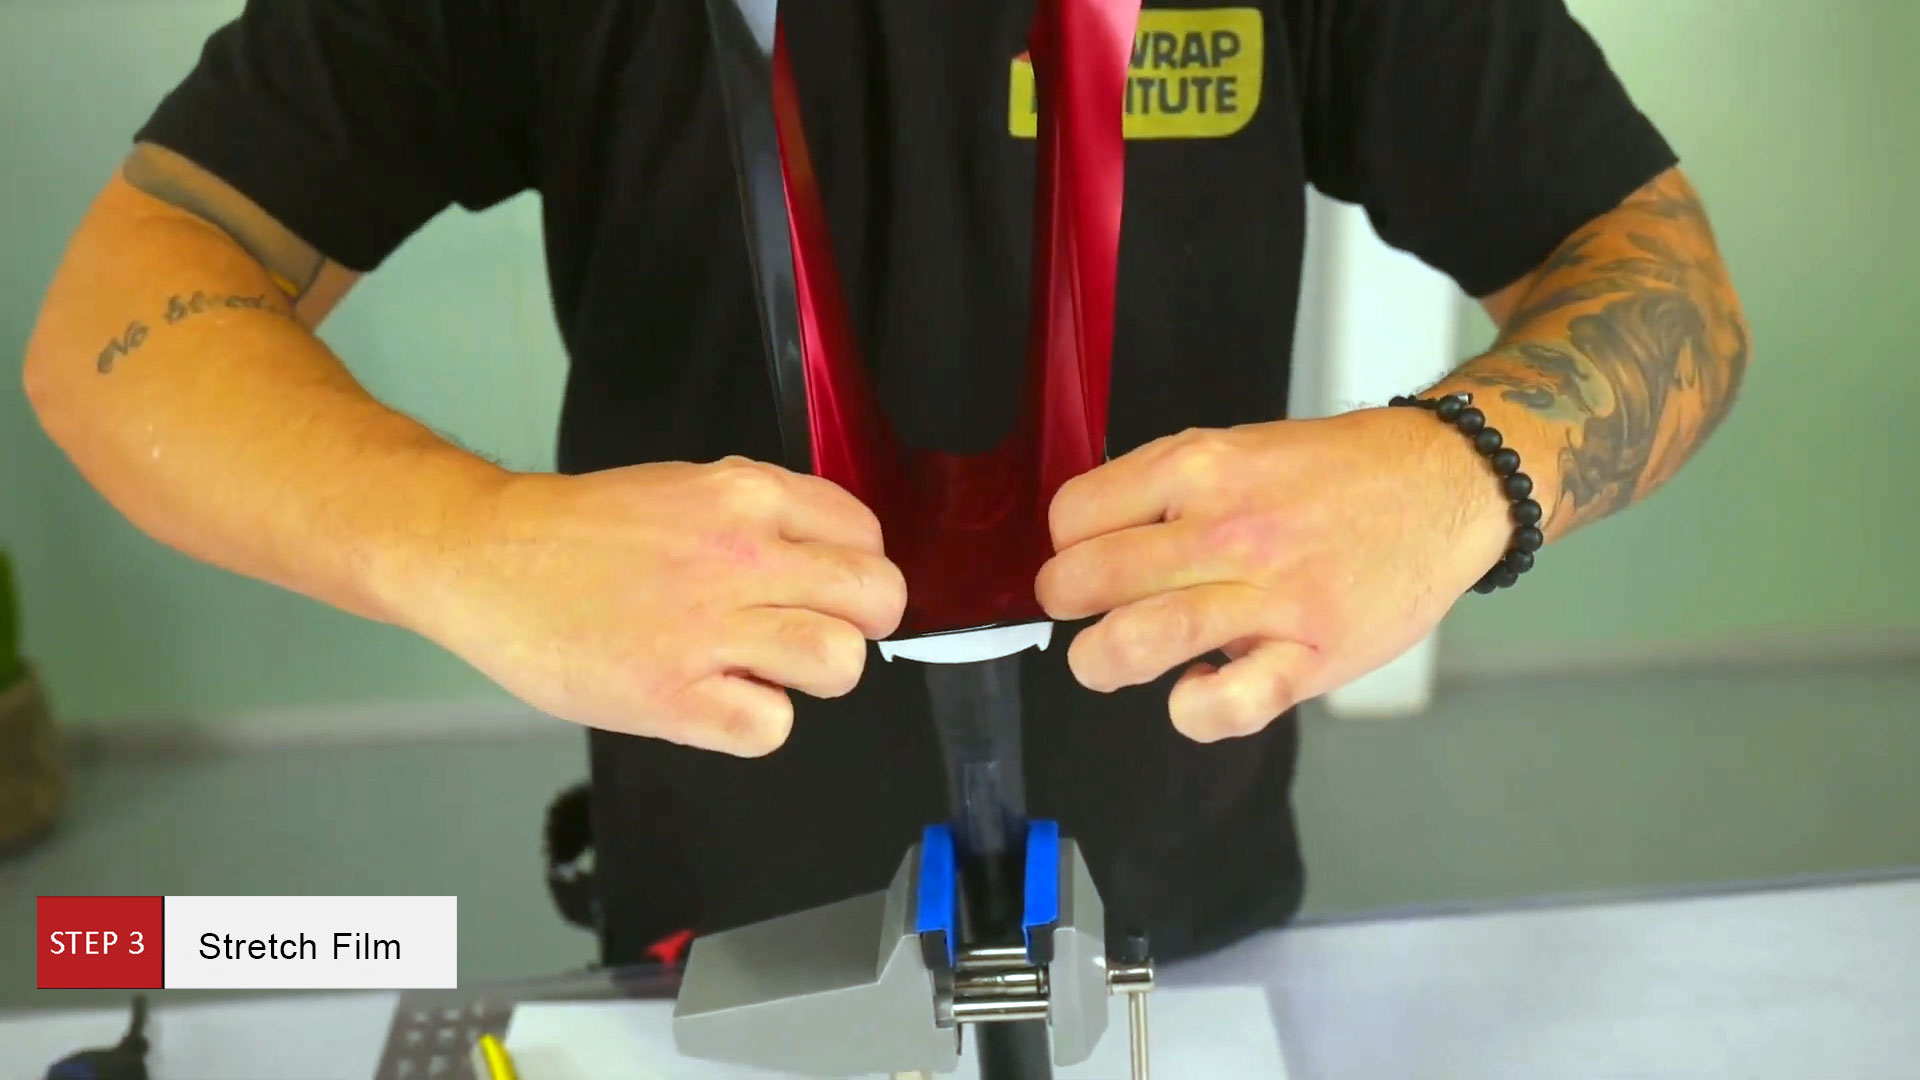
Step 3: Stretch Film
Once you are done and reach the top of the bike fork, use a heat gun to warm the vinyl and stretch it around the tip with care. Do not cut it out yet. Let it stay there so the adhesive activates, making it stick. Now, turn your attention to the other side and create a crevice at the bottom. Lift the film and stretch it over the lip to prevent it from overstretching.
Repeat the process for the opposite side of the bike fork, applying pressure to the vinyl as you work your way to the top. Make sure the top is secure and focus on the bottom once more. Stretch the film carefully around the front lip. You should feel a lot of tension in the film. Take a one minute break. Make a relief cut on both sides using a sharp blame, letting the film relax, as you continue it towards the outside. This part of the vinyl will go in the inside portion so make sure that it goes about one eight of an inch past the body light. Relief cuts will help here as this is the trickiest part of the installation. Repeat the process for the other side, starting with the relief cuts.
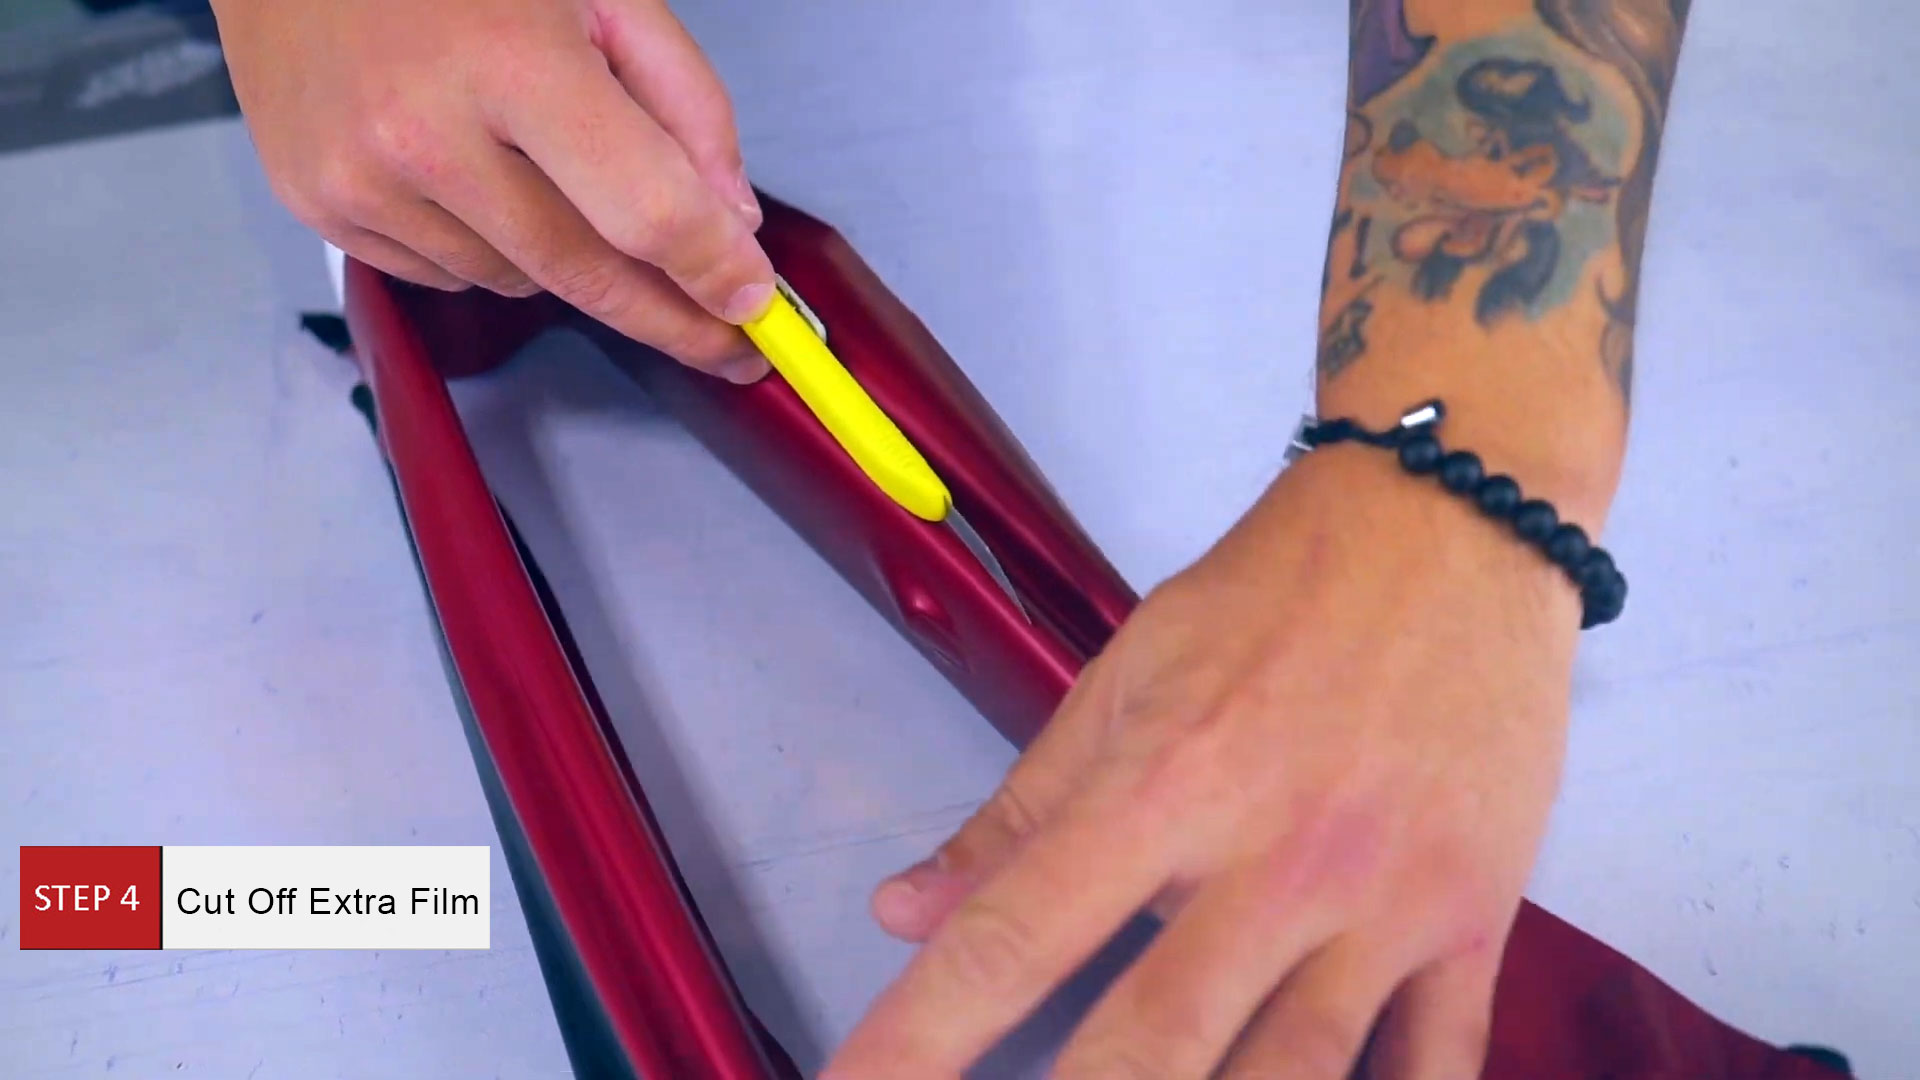
Scoop around the bottom of the bike fork and then wrap the film around the top. Now, use a sharp blade and gently cut on the body line. For the best possible result, we recommend using the 3M Knifeless tape, which is sold by Rvinyl. Repeat the body line cut on the other side and make sure the cut is symmetrical for a professional finish. Remove any excess vinyl and repeat the cutting process for the opposite side.
After you are done with the sides, you can now focus on the tips. For the best result, lay the fork flat on the table to make it stable. Using your free hand that is not holding the knife, hold the material and fork in place as you cut along the body line. Hold the knife at a 10 degree angle as to not but too deep, giving you a clean cut as a result.
Make a rounded cut at the edge and carefully remove the film. Do not cover the gap where the wheel is secured. You can ignore this area as it will get a lot of wear and tear.
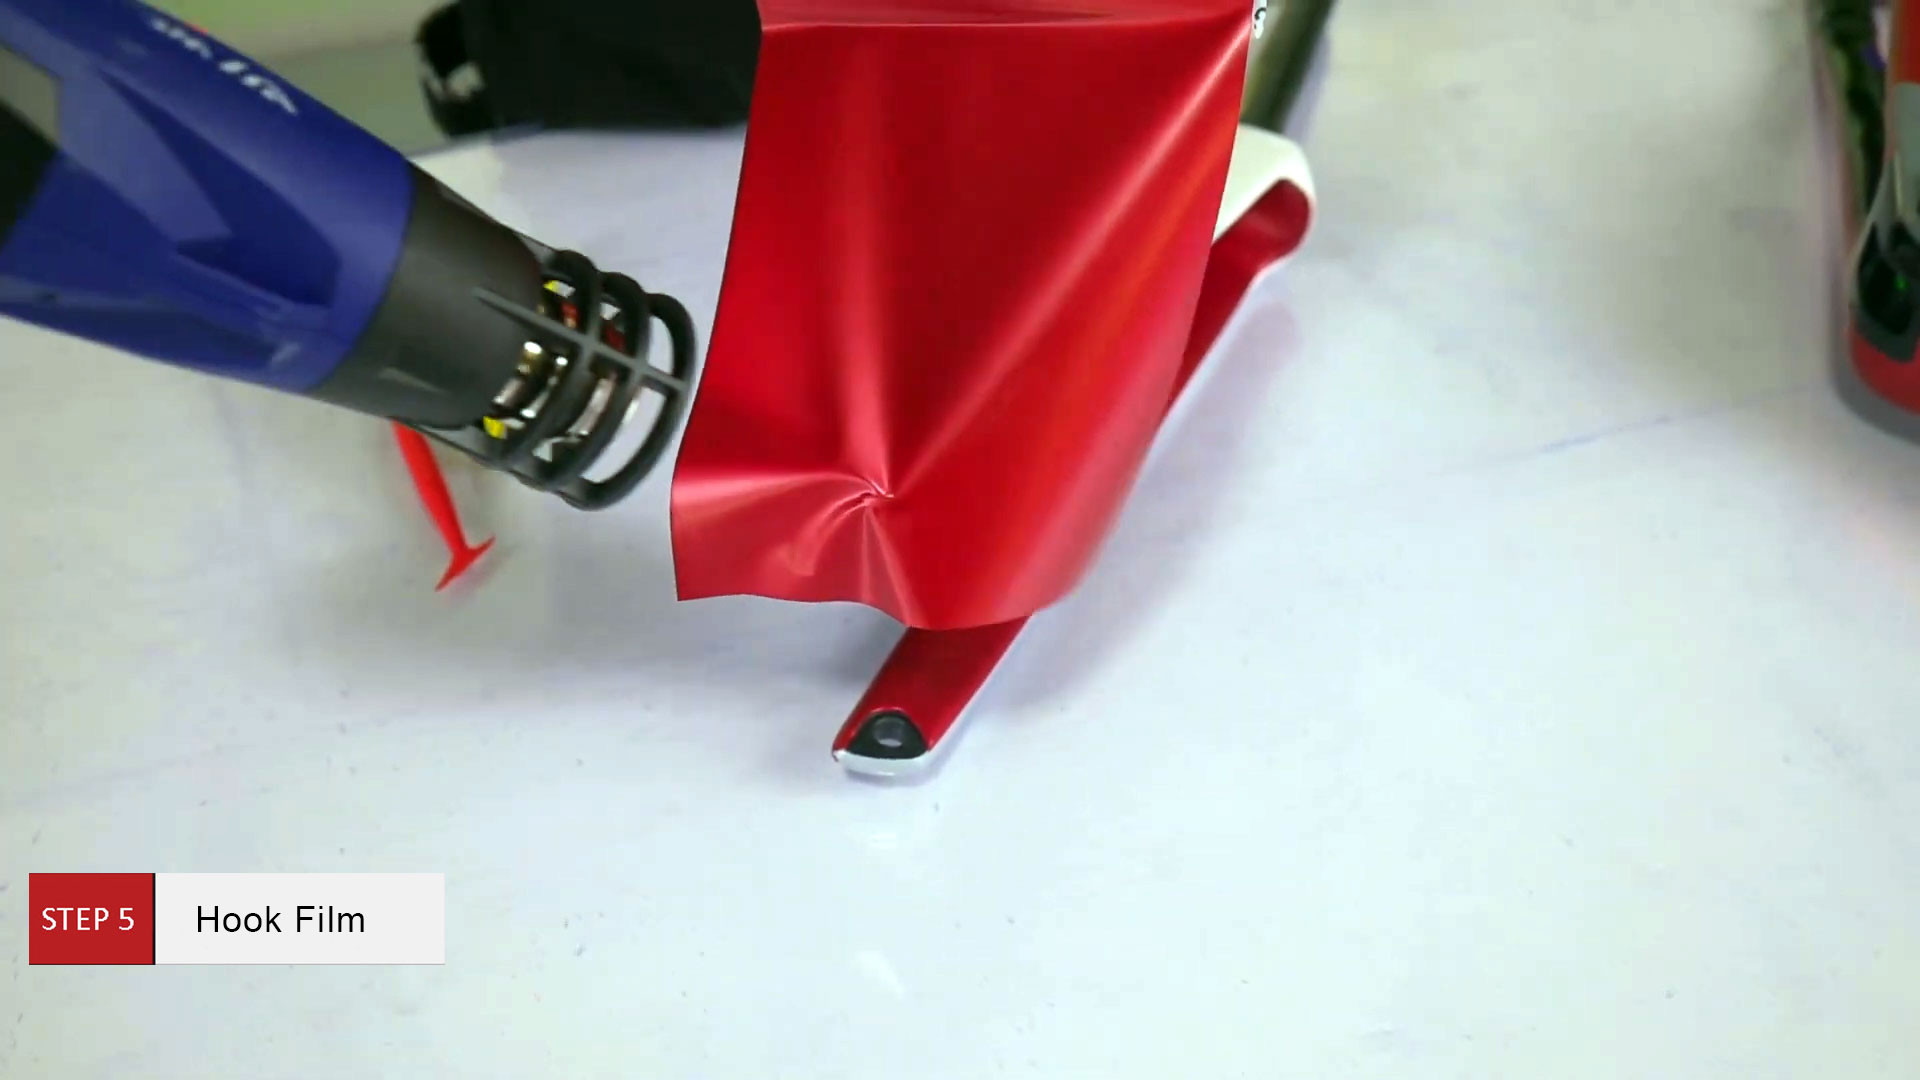
Step 5: Hook Film
Hook the bottom tip with the vinyl. Use heat to make the film secure. Keep the liner on halfway and stretch towards the top. Now, slowly release the liner as you stretch the film to the top and hook it to the top section. Wrapping should be easier as the tension is evenly distributed.
Lock the vinyl in place in the middle. Pick up the piece and gently apply pressure and relax the film. Now, cut away the excess film but leave an eighth of the inside portion to create an overlap that will cover any gaps. With care, remove any excess film and heat the film if needed which might be necessary and relax it towards the other side. You will need to scoop in the film in that area.
After the film overlaps, you can cut the film. Slow down on the bottom curved section and make a floating cut and leave a lit bit of excess film so that it can wrap around the overlap. Remove any excess film and seal any overlaps.
The section where the fork meets the frame, you can cut the vinyl so that the area is not covered. This way, your vinyl wrap will last for a long time.
Repeat the same steps for the other side.
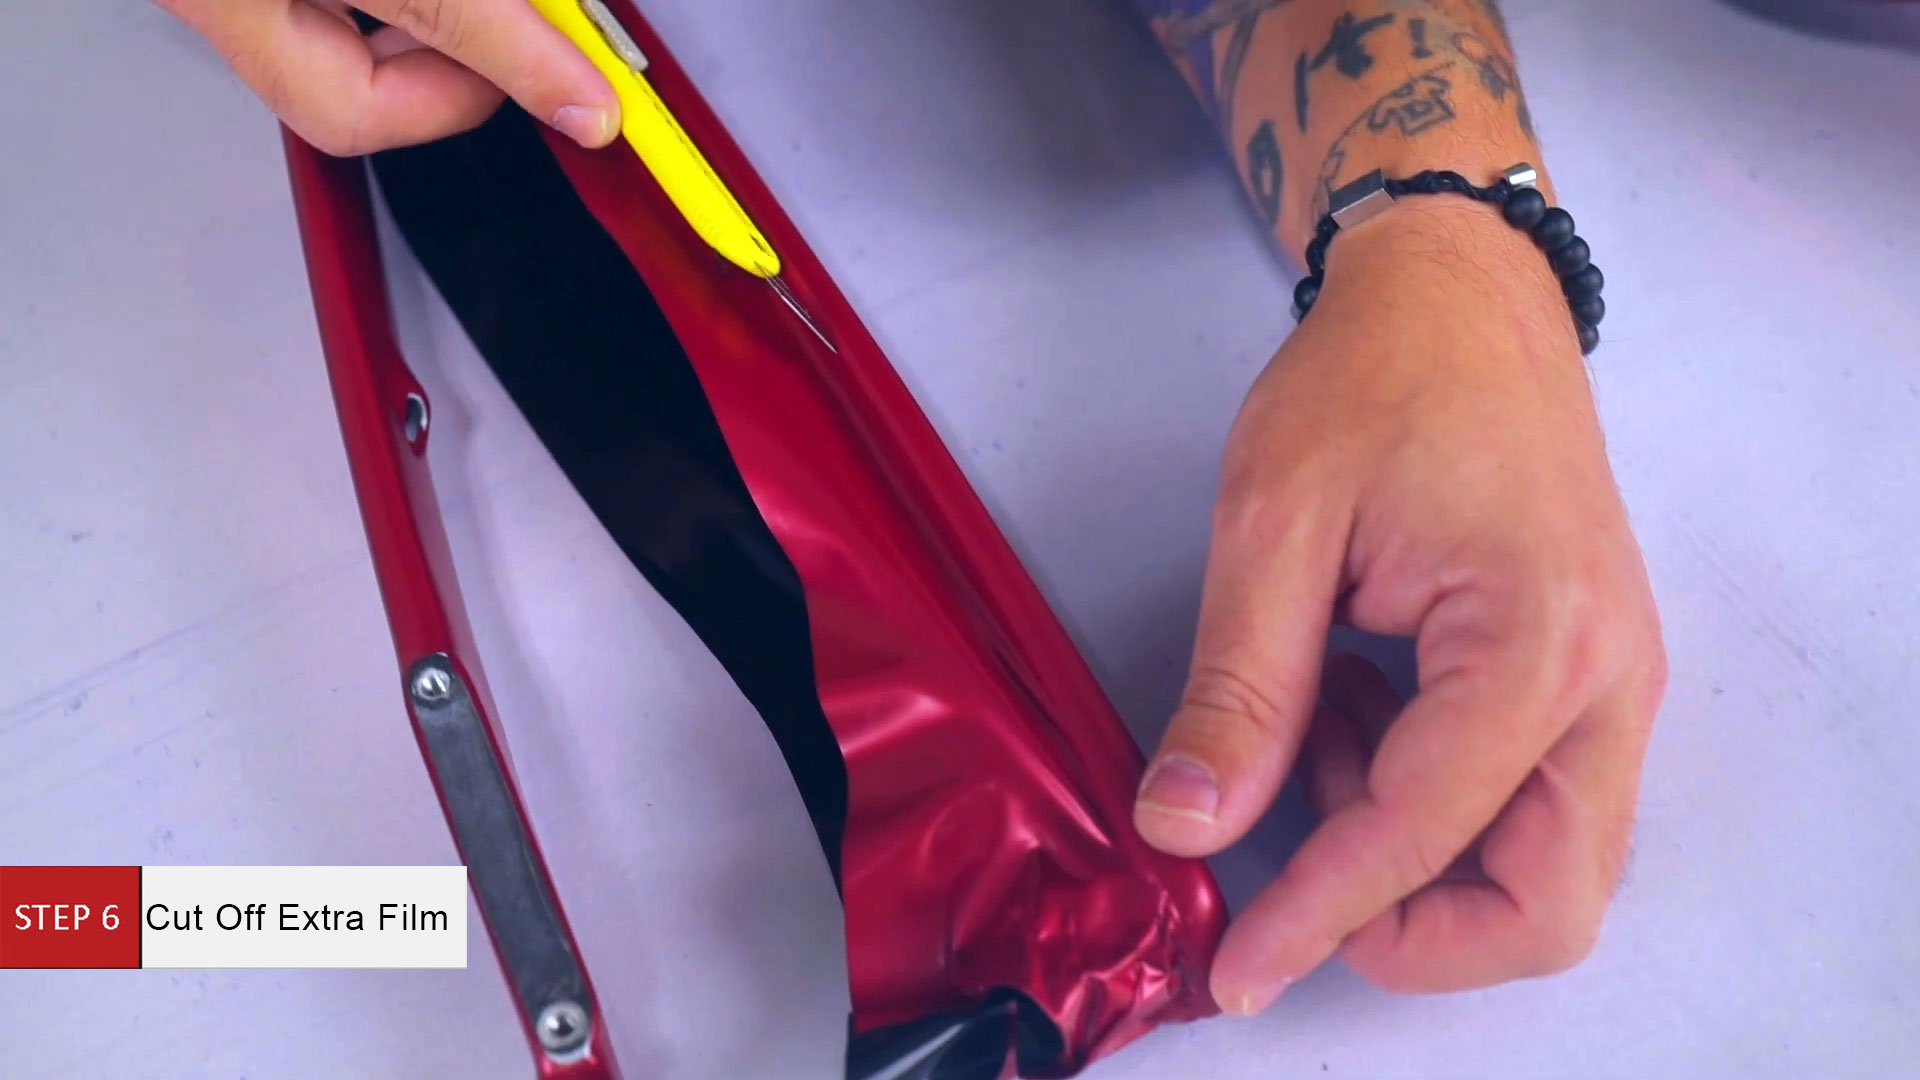
Cut any excess vinyl on the bottom section. Turn the fork over so it is standing up and tuck then film to the top. Once you verify that everything looks good and it is secure, make a uniform cut using the tip of the blade. Make sure the bike fork is stable so you can make precise cuts. After you have cut off any excess film, make sure that the bottom section is even. For best results, rotate the blade so you cut at a 10 degree angle. Remove any extra vinyl.
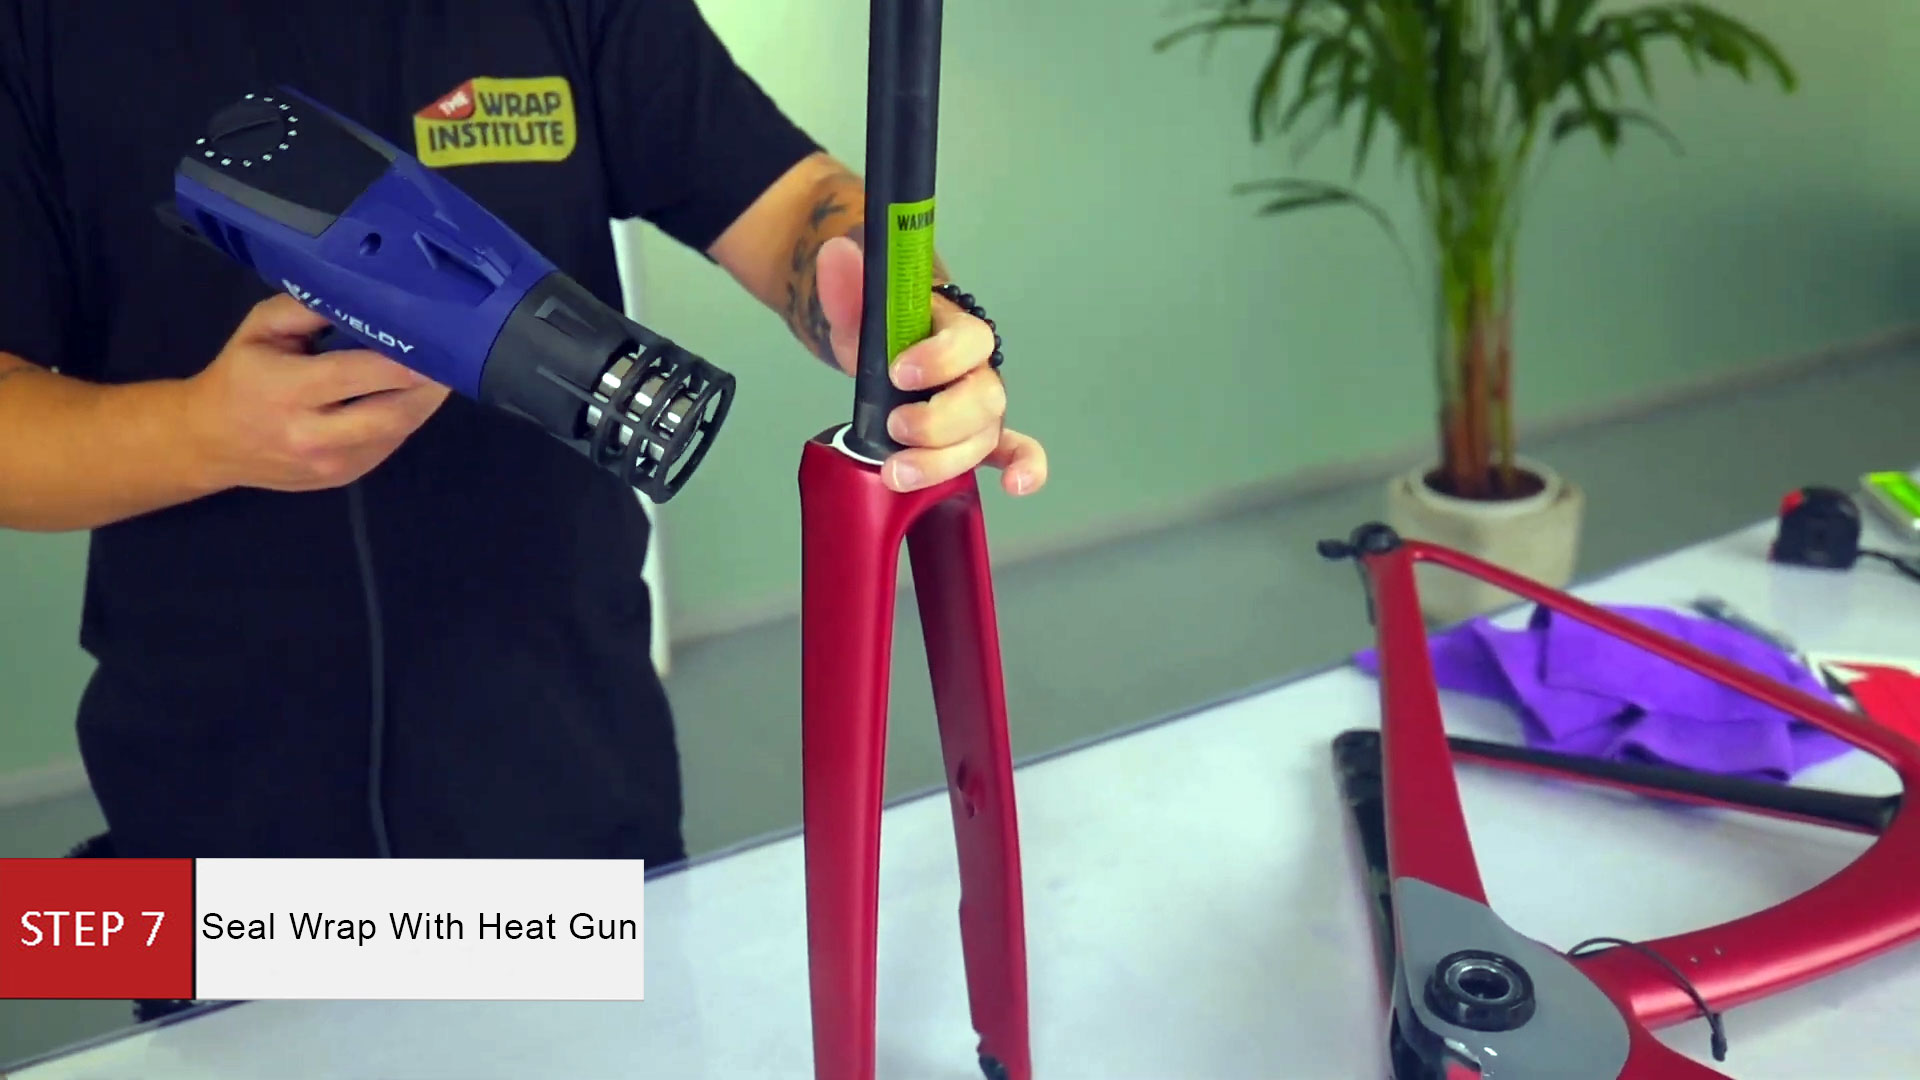
Step 7: Use Heat Gun to Make Sure Everything is Sealed
Go over the entire piece with a heat gun to make sure everything is sealed and the overlaps are closed. Meticulously go over the three pieces to make sure that they film is properly installed. When done properly, the vinyl wrap will last for a long time and the overlaps will make it all look like one piece.
Quality Products from Rvinyl
Visit Rvinyl and customize your bike with various colors and patterns. We make it easy to give your bike a new look in just under 10 minutes.