
Wrap Installation Methods
It’s time for a change, right?
Your car has had the same paint job since you bought it, and the color is worn out and unappealing. Or maybe you made a few changes within the past year, but you’re ready for a new look to boost your ride.
If you are thinking about installing a vinyl wrap to your car, truck or SUV, two options are available:
- Dry wrap application method
- Wet wrap application method
The only difference between the two methods is straightforward. Dry wraps don’t use fluid applicators, while wet ones do. And like all things in life, there are pros and cons to each technique, and the different applications suit specific styles.
A vinyl wrap gives you the freedom to customize your entire vehicle or change specific parts to enhance its overall appearance. From camouflage or colored films to matte or chrome, vinyl can take your car to a whole new level. Depending on your skill level and the type of film you are applying, refer to the following guide to see which method best suits your needs.
Wet vs. Dry Application
The wet vs. dry method is a common question people ask when they begin thinking about the sort of vinyl they want to install. Contingent on your wrapping experience, abilities and the kind of vinyl you are applying to your car, wet or dry applications may suit your situation better than the other. The advantages and disadvantages of each depend on what you are most comfortable with — there is no right or wrong method. Here are the differences you need to know between the two wrap installation applications.
Wet Wrap Application
Inexperienced installers often use the wet wrap application method because the process is easier and more forgiving compared to the dry technique. While it’s not recommended for convex and concave surfaces, the wet method applies better to flat areas. For example, if you are applying graphics to windows or smaller portions of vinyl to your car, the wet method is ideal. It has the advantage of resulting in no creases or bubbles — which is great for first-timers as the process may be complicated for you to perfect right away.
Wet wrap methods require application fluid to help the vinyl float on the surface during the adhesion process. The fluid prevents pre-adhesion, meaning the material won’t stick to your car before you’re ready. So if this is one of your first installations, you’re in luck! You can move the film around instead of having to rip it off your car for repositioning. In essence, the liquid deadens the adhesive for a short period. It’s seen as an advantage for you to make sure everything aligns well.
Some people purchase application fluid, and others make their own with soap and water. If you choose to make your own, you can add three drops of soap for every one liter of water for the right solution. If you add too much soap to the mixture, it can counteract the adhesive properties in the vinyl. The edges and corners of your DIY film will lift, or in the worst-case scenario, the entire film will rise from the surface. Be cautious when mixing soaps because those that have perfumes may affect the adhesives as well.
The process of using the wet method requires a squeegee. The squeegee allows you to remove the fluid between the adhesive and substrate. It’s also important to overlap your strokes to ensure all the air bubbles release so the film is smooth. Squeegee from left to right then up and down to get the best looking results on an even vinyl.
At this point, we know you’re dying to show off your car and maybe take it for a nice cruise after you finished the process, but it’s recommended you wait about 24 hours before using your vehicle and to re-squeegee the film into place. When you apply extra pressure on the edges of the wrap, it lessens the risk of them lifting.
You may be thinking you are ready to get to it and use the wet application method. However, there are a few more suggestions to follow when it comes to which type of film to use for this process.
- Don’t use the wet method when using air-egress vinyl. The wet process will trap excess fluid, and the adhesion development will fail.
- Never apply the film over rivets when using an applicator fluid. Moisture can collect underneath and cause the vinyl to crack while also lifting the edges.
- Never use the method on unpainted metal with reflective or metalized products. In this case, the fluid can cause corrosion, de-lamination of the film and make it blacken.
- Use the wet wrap method if you are using transparent or translucent vinyl.
- You should avoid wet wrap application if you can use the dry method.
Pros of the Wet Wrap Method
The advantages of applying the wet wrap method are as follows:
- Fluid helps prevent pre-adhesion.
- It’s easier and more forgiving for first-time users.
- It’s ideal for flat surfaces.
- The fluid allows you to reposition the vinyl with ease as it gives you flexibility and won’t damage the paint on your vehicle or the new vinyl.
- The process is applicable for graphics placed on glass.
- The wet method is better for smaller applications, but not too little where it would soak the decal or film and ruin its adhesive properties.
- Wet wraps help you avoid problems like static.
Cons of the Wet Wrap Methods
While the wet wrap method is excellent for rookie vinyl installers, there are a few downfalls to consider before applying your film, such as:
- It’s not ideal for curved surfaces.
- You must re-squeegee after 24 hours of installation.
- The film becomes more difficult to remove.
- The process takes longer for the vinyl to adhere to the car because the fluid must dry and conform to its surfaces.
- The wet method is recommended for specific vinyl materials and coatings.
Wet Wrap Installation Steps
Although the procedure of installing vinyl film to your car, truck or SUV results in a new color or pattern for your vehicle, there is a slight difference when using the wet technique compared to the dry. But don’t worry — it’s nothing you can’t handle!
Here is a shortened version of the appropriate steps to take when using the wet wrap installation.
- Clean the surface of your car with a solvent and water. Dry with a lint-free cloth.
- Peel the liner from the back of the vinyl and mist the adhesive side with your application fluid. Make sure not to apply too much.
- Spray the surface where you’re placing the vinyl.
- Align and position the film on the damp surface and press down.
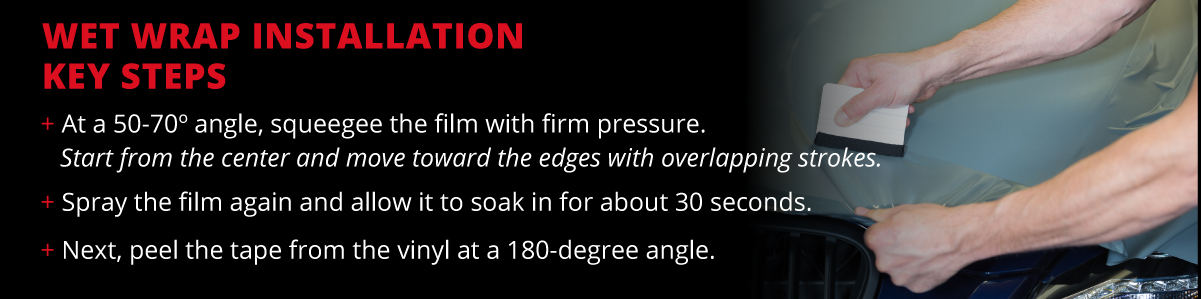
- At a 50-70 degree angle, squeegee the film with firm pressure. It will force out excess fluid from underneath the film. Start from the center and move toward the edges with overlapping strokes.
- Spray the film again and allow it to soak in for about 30 seconds.
- Next, peel the tape from the vinyl at a 180-degree angle.
- Re-squeegee the areas with a low-friction sleeve. It will protect the vinyl from scratching and is essential in preventing the edges from lifting.
Dry Wrap Application
In opposition to the wet wrap application, the dry wrap application method is the quicker and cleaner technique of the two. The dry process ensures immediate adhesion between the film and surface of your vehicle. Because it creates an initial higher bond, you don’t need to squeegee again after 24 hours or experience the hassle of the vinyl sliding around.
Installing vinyl with the dry technique often requires more skill. But as the saying goes, practice makes perfect. Once you perfect the wet application method, you will have a smoother transition in using the dry. You can hone your skills with each go-around to apply vinyl to your car or even to other people’s vehicles.
Using the dry wrap method depends on the actual skill of the installer as opposed to relying on a fluid to help you with positioning. The process is more difficult to handle because the vinyl can stick to the surface of your car immediately upon touching, so be cautious! If you find you need to reposition parts of your film, you will need to lift the film and move it. However, some damage may occur to the paint of your car or the vinyl if you have to reposition it several times.
The dry application method saves you time and money by using a firmly pressed squeegee technique. The method is also used for large projects and often requires two people to complete the job. It’s the perfect DIY project for you and a friend who’s a car enthusiast like you. With two sets of hands, the vinyl can remain taut as to avoid wrinkles and ensure a smooth application.
Because installers use the dry method for more significant sections of their vehicles, they are more likely to come across curves and divots. When dealing with curved surfaces, heating the film will allow it to conform to the shape of the vehicle, but be careful not to overheat the vinyl.
For example, crow’s feet are unavoidable no matter how good you are as an applicator. When they appear, lift up the film and apply a slight amount of heat until the wrinkles fade away. There is no doubt wrinkles will occur, so repositioning the film with tension will release the lines.
No matter the type of vinyl you are applying to your vehicle, the dry method is suitable. People often use the installation method for opaque vinyl wraps, but whether you are installing a camouflage film, matte black or brushed aluminum, avoiding the wet process may be your best bet if your skills are up to par.
Pros of Dry Wrap Method
The positive outcomes of using the dry wrap method are also why it’s the more popular of the two techniques. The pros of the dry application are as follows:
- It is a more straightforward process when you apply vinyl around curves.
- It’s a faster and cleaner technique.
- The dry method saves you time and money.
- The vinyl immediately adheres to the surface of your car.
- You don’t have to apply extra squeegeeing after 24 hours.
Cons of Dry Wrap Method
The negative possibilities of using the dry method include:
- If the vinyl touches the substrate before you’re ready, you will have to lift it and reposition the film instead of sliding it around. It may raise the paint off your car or warp the pattern of the vinyl.
- The dry application method requires a higher level of skill.
- You can’t rely on water to help you reposition the film.
Dry Wrap Installation Steps
If you are a trained installer or have a few vinyl applications checked off, the application process may be as natural as ever. But for those who are starting off, here is a short guide on how to install vinyl film using the dry wrap process.

- Clean and dry the surface of your vehicle before application.
- Make sure the regulated temperature is between 70-80 degrees F, and you install the vinyl indoors, away from sunlight and in a well-lighted, clean environment.
- Align your film with the designated area.
- Use firm pressure to adhere the vinyl to the surface and overlap the film by about 50%.
- Hold the squeegee between a 50- and 70-degree angle and position the film where you want.
- Mark the spots where it aligns using a pencil or masking tape.
- Remove the film from the liner and position it using light pressure.
- Hold the vinyl taut and smooth away from the surface with one hand and squeegee horizontally from the center to the edges.
- Squeegee the film using smooth strokes.
- To remove air bubbles, you can use an air release tool.
- After waiting about 10 minutes for the adhesion to build a bond, you can squeegee the vinyl’s edges, overlapping seams and other areas with firm pressure.
Recommended Tools and Conditions for Wrap Installation
Whether it’s the first time you’re applying vinyl to your vehicle, or you have a few installations under your belt, there are several tools recommended to help you along the way no matter the method you choose. Additional to the list of material, specific conditions and environments are necessary for proper installation. For you to apply the perfect DIY vinyl film, here is what you need to know.
Recommended Tools:
- Air release tool
- Gloves
- Isopropyl alcohol
- Lint-free towel
- Marking pencil
- Masking tape
- Razor knife
- Squeegee — felt-edge and smooth cloth
- Tape measure
The Best Conditions and Environment for Installation
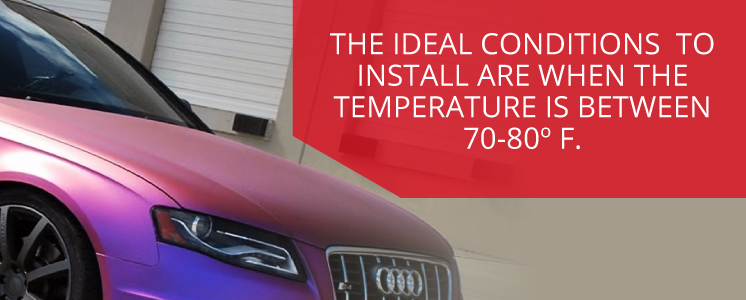
You have your tools set up, and you’re ready to go — but not quite yet. Applying film to your vehicle in the right conditions is imperative. For example, go ahead with the process when the temperature is between 70-80 degrees F. If the heat is too low, the risk of tearing the vinyl is higher. In cold temperatures, your film becomes brittle and fragile.
On the other hand, if temperatures are too high, the adhesive bind in the film will be more aggressive as you try to apply it to a surface. With quicker bonding, it’s more difficult to reposition the vinyl into the perfect area.
Although you may want to work outside if the weather is ideal, it’s essential to apply the film indoors and away from direct sunlight. Not only will working in a garage help maintain a consistent temperature, but it will also reduce the collection of dust and other contaminants from forming on the surface of your car.
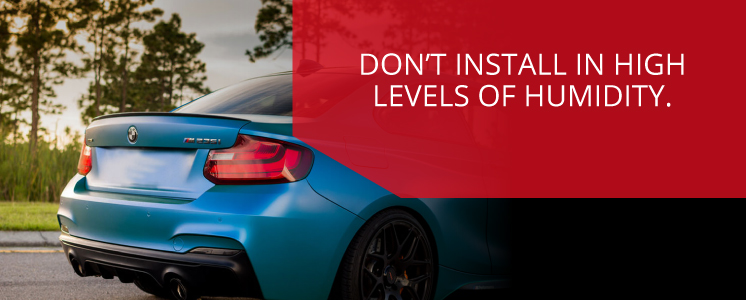
Before and after you use the vinyl, store it away from heat sources as they will activate the adhesive properties. You wouldn’t want to pull out your film and have it melted together. Storing it in an area with low humidity and in a vertical position will help maintain its properties. When you finish using the wrap, make sure it’s wound around the core.
- Apply vinyl in temperatures between 70-80 degrees F.
- Apply indoors and away from sunlight.
- Don’t install in high levels of humidity.
- Store away from heat and at a vertical angle.
Vinyl Installation Tips
To gain a more in-depth look at how to install vinyl wraps to your vehicle, refer to Rviny’s wrap installation instructions.
No Matter the Method, Choose Rvinyl
Our 3M™ Wrap Film 1080 Series and extensive line of other vinyl are the perfect products to get your car looking better than ever. Rvinyl offers vinyl wraps that are stylish yet affordable for any DIY installation. We know you love installing films on your own, so we manufacture our vinyl wraps with DIY enthusiasts in mind. With more than 100 colors available along with different styles and patterns, we can help you customize your ride.
Rvinyl vehicle wrapping is a fraction of the cost of what tint shops offer, and our products come with a three-year warranty against peeling, cracking and fading. We also replace defective films and provide product rebates when you submit photos of your vinyl installation. Yes — we love to see your work!
Get your car, truck or SUV looking the way you’ve always dreamed. Shop our products online and order from Rvinyl.