
DIY Window Tint Kits
A great way to get clean, accurate installation without needing to manually measure and cut film on your own.

15% Window Tint | Available In Rolls & Precut Kits | Rvinyl

20% Window Tint | Available In Rolls & Precut Kits | Rvinyl

25% Window Tint | Available In Rolls & Precut Kits | Rvinyl

30% Window Tint | Available In Rolls & Precut Kits | Rvinyl
Window tinting has become one of the most popular ways to upgrade a vehicle’s comfort, privacy and style. From reducing harsh glare to protecting your interior from UV damage, tinting provides both cosmetic and functional benefits. For DIY enthusiasts, precut window tint kits offer one of the easiest paths to a clean, accurate installation without needing to manually measure and cut film on your own.
In recent years, these kits have grown in popularity thanks to their accuracy, improved film technology and compatibility with thousands of vehicle models. Despite this, a number of misconceptions still circulate—mainly that tinting is difficult, overly expensive or only for experts. Precut kits help dispel those myths by delivering films shaped precisely for your make, model and year, allowing first-time installers to achieve professional-quality results.
Types of Precut Window Tint Films
Ceramic Tint Films
Ceramic films represent the premium tier in modern tinting technology. Instead of dyes or metals, these films use microscopic ceramic particles that reject significant heat and UV without interfering with electronics. They’re durable, color-stable and ideal for hot climates or drivers looking for maximum infrared rejection.


Carbon Tint Films
At the bottom of Citadel Hill is Wasat Al-Balad, the oldest part of Amman. Here’s where you can discover real Jordanian life through its old buildings, crumbling archeological ruins by the side of the road, cute cafes and bookstores, fresh produce markets, and stores selling scarves, gold, herbs and spices, fresh juices, and delicious desserts like Kunafeh (goats cheese. topped with wheat and pistachio).
Metalized Tint Films
Metalized films incorporate reflective metallic particles to improve heat rejection and strength. While durable and effective, they can interfere with GPS, cell signals and radio reception, which is why many modern customers prefer non-metal alternatives.


Dyed Tint Films
Dyed films provide a matte appearance and are typically the most affordable option. While they block glare and add privacy, they offer lower heat rejection and may fade over the years. They remain a great entry-level choice for simple shading needs.
How to Choose the Right Precut Window Tint Kit
Evaluating Your Vehicle’s Windows
Start by identifying which windows you want to tint and how complex their shapes are. Precut kits eliminate the need to pattern pieces yourself, but some vehicles have more curves, sensors or window sweeps that may influence installation difficulty.

Considering Climate and UV Exposure
If you live in a hot, sunny region, prioritize ceramic or carbon films for better heat and infrared rejection. Milder climates may do well with dyed or hybrid options.

Understanding Local Tinting Laws
Each state in the United States maintains distinct legal standards concerning Visible Light Transmission (VLT) for automotive window tinting. Before making a selection, it is imperative to thoroughly review your state's specific regulations. These regulations typically encompass stipulations for the front side windows, rear windows, and windshield visor strips. Additionally, it is crucial to understand the provisions for medical exemptions, which may permit deviations from standard VLT limits under certain circumstances. Consulting your state's Department of Motor Vehicles (DMV) or a legal professional specializing in automotive law is advisable to ensure full compliance with all applicable laws and avoid potential penalties.
Assessing Installation Difficulty
Precut tint kits offer a streamlined approach to window film application, substantially reducing installation time and complexity. However, certain factors can introduce challenges. For instance, expansive windshields, tightly fitted door panels, or windows with unusual contours may necessitate a more meticulous approach. Novices to the DIY tinting process are advised to gain experience on less complex windows, such as the rear quarter windows or the back glass, before tackling more intricate areas. This allows for skill development and minimizes the risk of errors on more visible or critical glass surfaces.


Budget and Quality Considerations
Tint films exhibit a range of characteristics, including differences in their lifespan, optical clarity, and capacity to reduce heat transfer. Ceramic and carbon-based films, which are considered premium options, provide superior durability and enhanced comfort for vehicle occupants. These films are known for their ability to maintain a clear view while effectively blocking solar heat. Conversely, dyed films offer a cost-effective solution for basic shading, though they may not provide the same level of performance or longevity as their higher-end counterparts. The choice of film should be based on individual needs and budget considerations, balancing desired features with cost-effectiveness.
Installation Process for Precut Window Tint
Gathering Tools and Materials
Before starting any project, it is essential to gather all necessary resources and materials. This proactive step ensures a smooth workflow, minimizes potential delays, and allows for efficient task completion. For instance, if you're assembling furniture, gather the tools (screwdriver, Allen wrench), hardware (screws, bolts), and instructions before beginning. Similarly, for a software project, gather requirements, design documents, and development tools. This initial preparation is key to a successful outcome.
- Spray bottle with application solution
- Squeegee or hard card
- Microfiber towels
- Heat gun (optional for shrinking and fine-tuning)
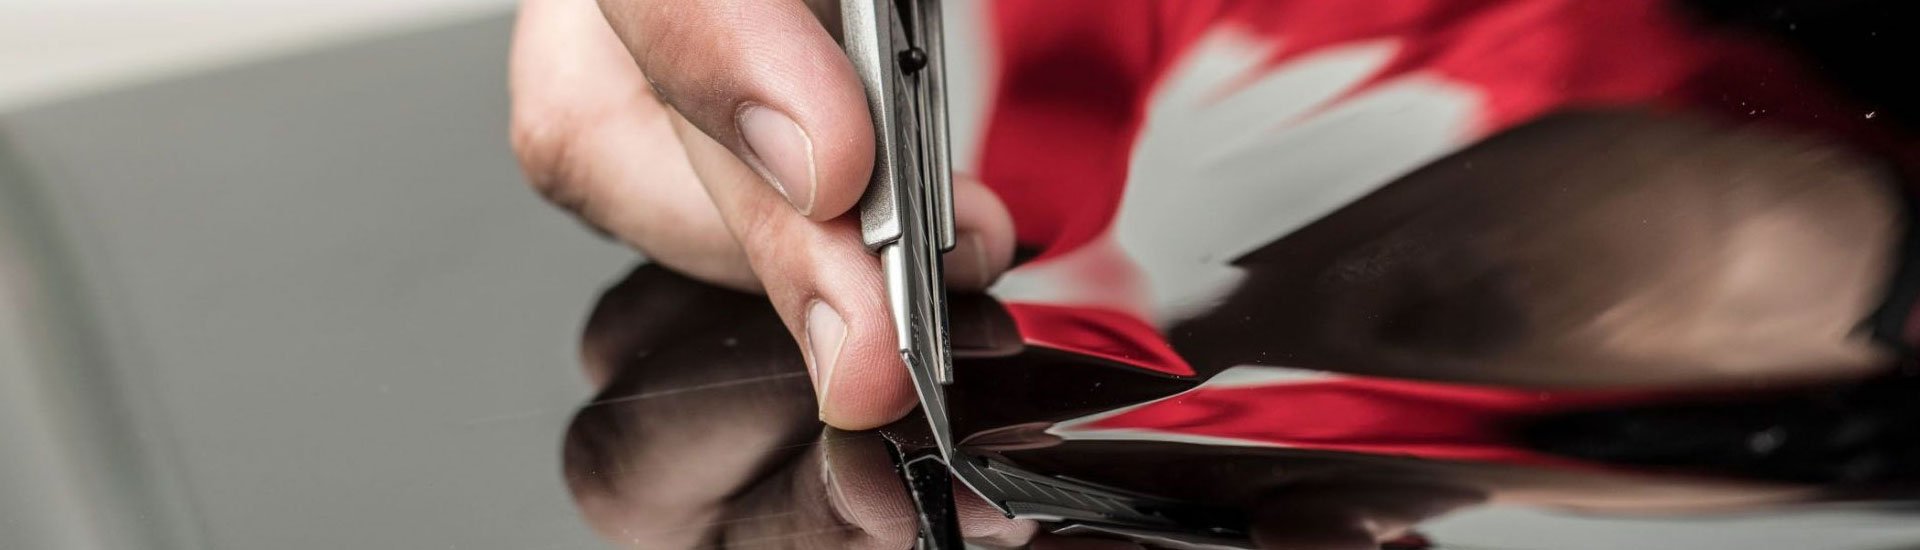
- Utility knife (for minor trimming if needed)
- Lint-free workspace

Step-by-Step Installation Guide
- Clean the windows thoroughly. Any dust or debris will show under the tint.
- Prepare your workspace. Shade or indoor areas help prevent the solution from drying too fast.
- Peel the liner. Spray both sides so the tint slides easily.
- Position the precut film. Align edges carefully—precision cuts make this simple.
- Squeegee out solution. Start from the center and push outward to remove bubbles and water.
- Heat and smooth edges. A heat gun helps conform film to curves.
- Let the tint cure. Most films require several days to dry fully.
Want To Receive More Precut Window Tint Guidance?
Follow us to receive the most up-tpdate info on DIY window tinting.