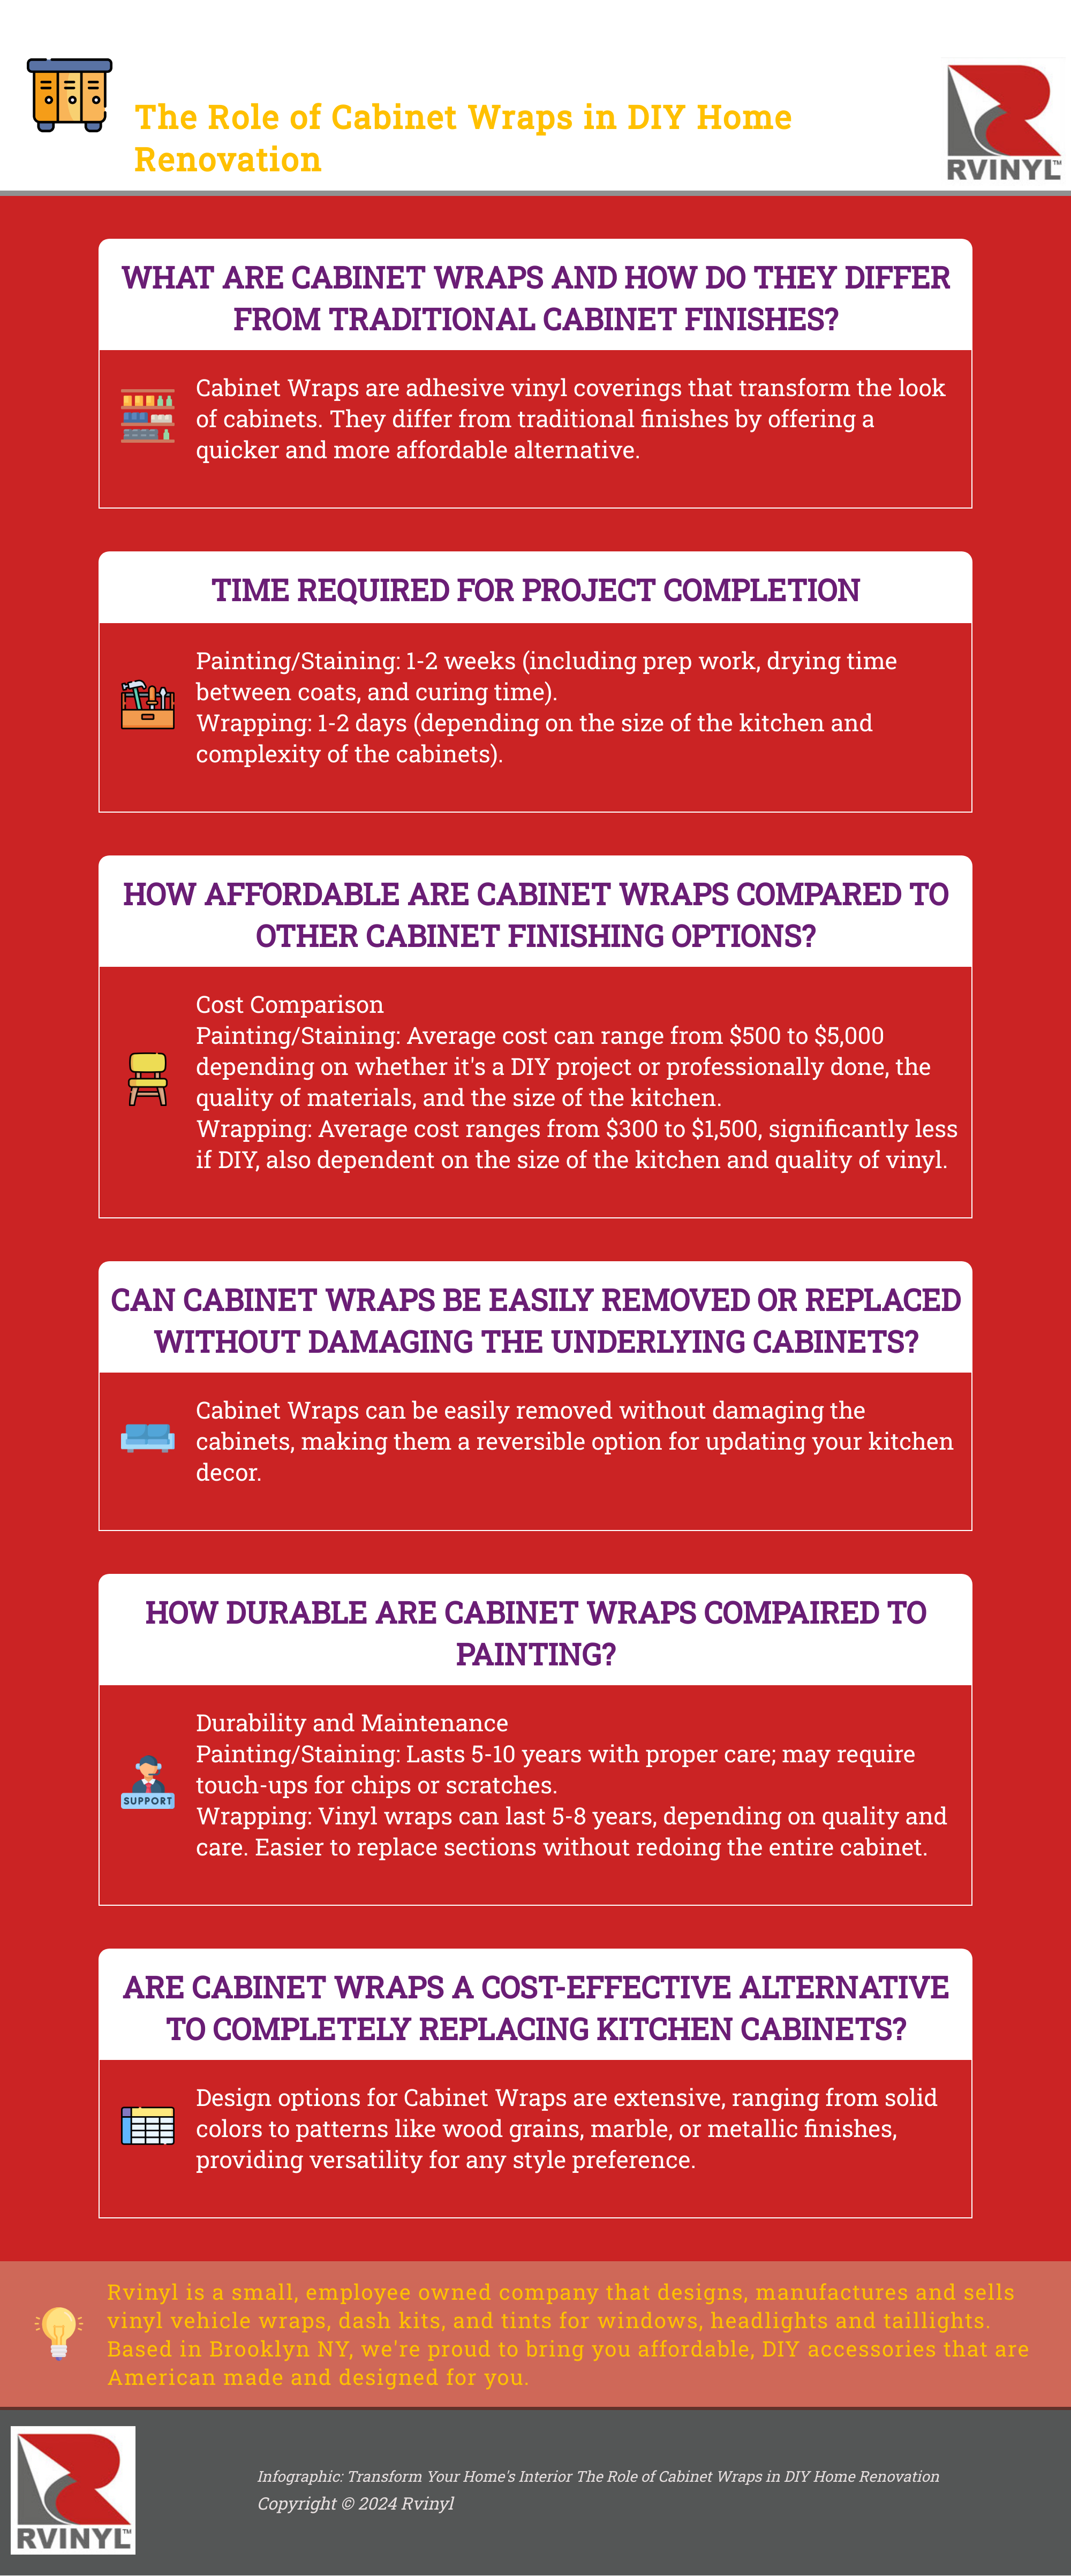
Cabinets Wraps: The Smart, Cost-Effective Alternative
Are you looking to refresh your kitchen, garage, or bathroom cabinets but dread the thought of a messy, time-consuming, and expensive renovation? You're not alone. The traditional route of painting or staining cabinets, while popular, often comes with a hefty price tag and a long list of inconveniences. However, there's a game-changing solution on the horizon that's set to revolutionize the way we think about home improvement: vinyl cabinet wraps.
Why Choose Vinyl Wraps?
Vinyl cabinet wraps are emerging as a highly attractive alternative for several compelling reasons. They're not only more affordable than painting or staining but also significantly less messy and time-consuming. This innovative method allows homeowners to achieve a brand-new look without the hassle of dealing with paint cans, brushes, and the inevitable clean-up afterwards.
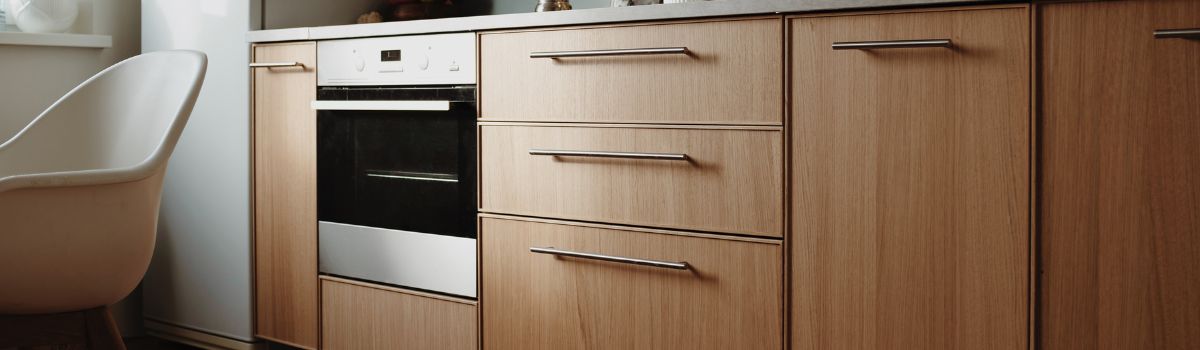
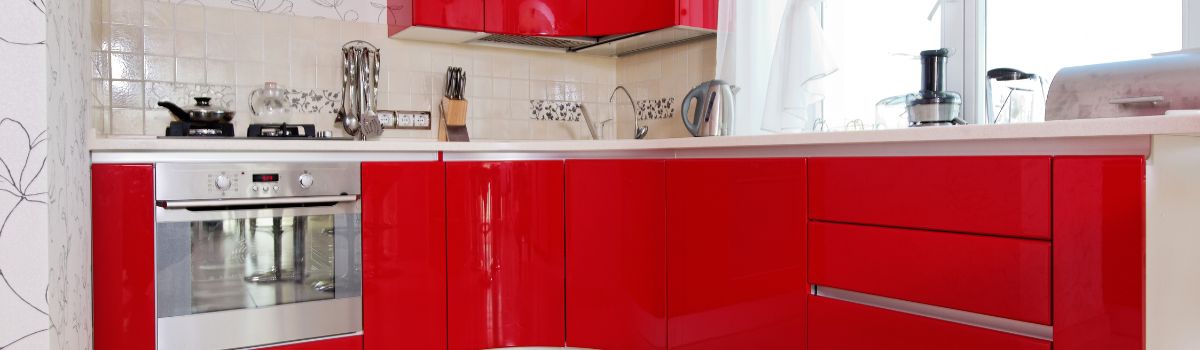
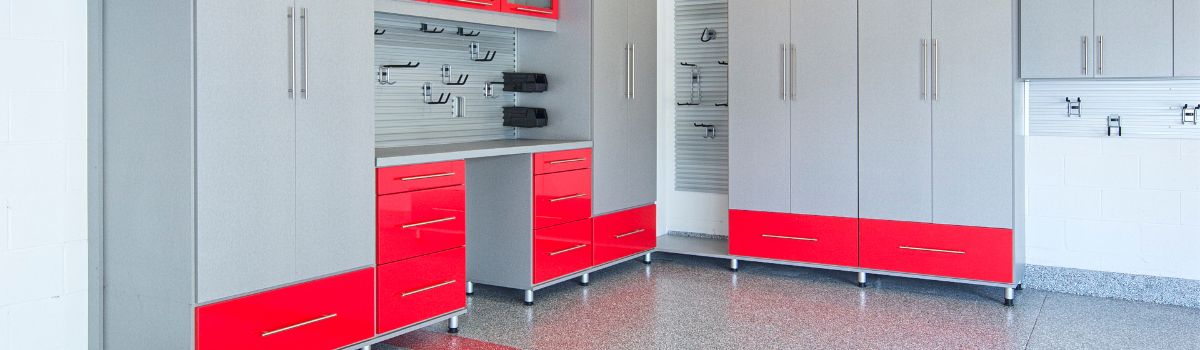
Moreover, the world of vinyl wraps offers something that traditional methods can't compete with: variety. Thanks to industry leaders like Rwraps, 3M, Avery Dennison, and ORACAL, the market is flooded with options that extend far beyond simple color changes. Imagine transforming your cabinets with the sleek look of brushed metal or the high-tech appeal of carbon fiber. These textured finishes can elevate the style of any space, adding a touch of sophistication and modernity that paint simply can't match.
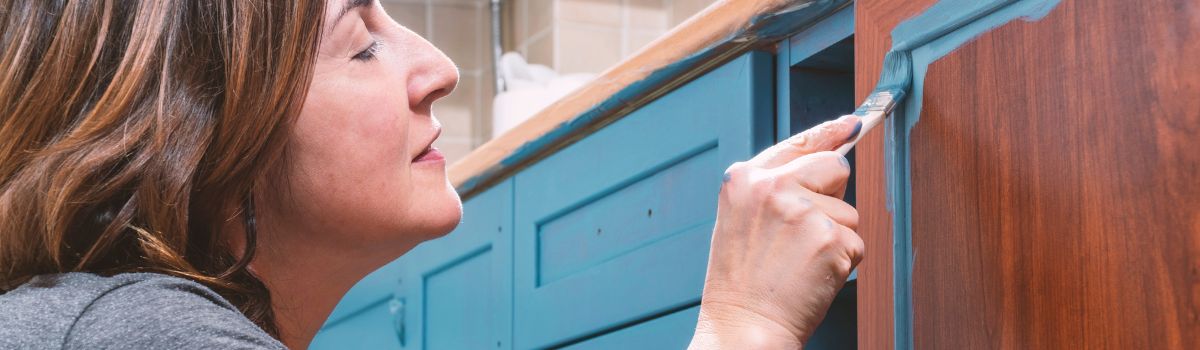
Repainting Your Cabinetry
Painting or refinishing cabinets with paints or stains is a detailed process that can breathe new life into your kitchen, bathroom, or garage cabinets. It's a popular method for those looking to update their space without the cost of full cabinet replacement. Here's a step-by-step guide to painting and refinishing cabinets:
1. Planning and Preparation
- Choose Your Finish: Decide whether you want to paint or stain your cabinets. Paint offers a wide range of color options and a more uniform appearance, while stain showcases the natural wood grain.
- Gather Materials: You'll need sandpaper, primer (if painting), paint or stain, a paintbrush or roller, and optional topcoat for protection.
2. Remove Hardware and Doors
- Disassemble Cabinets: Carefully remove the cabinet doors, drawers, and hardware. Label each piece with its location to ensure easy reassembly.
3. Clean Surfaces
- Thorough Cleaning: Clean all surfaces to be painted or stained with a degreasing agent. This step ensures that the new finish will adhere properly.
4. Sanding
- Smooth the Surface: Sand the cabinet doors, drawers, and frames to remove the old finish and smooth out imperfections. If painting, you'll want a smoother surface; for staining, just enough to allow the stain to penetrate.
5. Apply Primer (If Painting)
- Prime the Wood: Apply a coat of primer to all surfaces. Primer helps the paint adhere better and provides a more uniform finish, especially when making drastic color changes.
6. Apply Paint or Stain
- Painting: If painting, apply at least two coats of paint, letting it dry and lightly sanding between coats for the smoothest finish.
- Staining: If staining, apply the stain with a brush or rag, working in the direction of the grain. Wipe away excess stain. Depending on the desired opacity, you may need one or several coats.
7. Apply Topcoat (Optional but Recommended)
- Protect the Finish: For painted cabinets, an optional topcoat can add durability and protect the paint from chips and stains. For stained cabinets, a sealant like polyurethane can protect the wood and enhance its natural beauty.
8. Reassemble Cabinets
- Put Everything Back Together: Once the paint or stain is fully dried and cured, reattach the hardware, doors, and drawers. Adjust hinges as necessary to ensure proper alignment.
Tips for Success
- Patience is Key: Allow ample drying time between coats and before reassembly. Rushing the process can lead to fingerprints, smudges, or sticking doors.
- Ventilation: Work in a well-ventilated area to avoid inhaling fumes from paint or stain.
- Quality Materials: Invest in high-quality paint, primer, and tools. They can make a significant difference in the ease of application and the durability of the finish.
Refinishing cabinets is a labor-intensive process that requires patience and attention to detail. However, the transformation can significantly update the look of your space at a fraction of the cost of new cabinets. Whether you choose to paint or stain, the effort put into this project can result in a rewarding and stylish outcome.

Cabinet Wraps: An Advantage You Can See
Vinyl wrapping your cabinets is an innovative and less labor-intensive alternative to painting or staining, offering a fresh look with minimal disruption and effort. Here's a comparison of the vinyl wrapping process against the traditional painting or staining approach:
Vinyl Wrapping Process
- Planning and Selection:
- Choose the vinyl wrap color and texture. Options range from matte, gloss, to textured finishes like wood grain, carbon fiber, or brushed metal.
- Prepare the Surface:
- Clean the cabinets thoroughly to remove grease, dust, and debris. Unlike painting or staining, sanding isn't required, but surfaces should be smooth and clean for the best adhesion.
- Measure and Cut the Vinyl:
- Measure the cabinet surfaces and cut the vinyl wrap to size, allowing a bit of extra material for adjustment and trimming.
- Apply the Vinyl Wrap:
- Peel the backing off the vinyl to expose the adhesive side. Apply the vinyl carefully, starting from one edge and using a squeegee or similar tool to smooth out bubbles and wrinkles as you go.
- Trim and Finish:
- Once the vinyl is in place, trim any excess material with a precision knife for a clean edge. Heat may be applied to ensure the vinyl conforms to the shape of the cabinets and adheres properly around edges and corners.
- Reassemble Cabinets:
- If you removed any hardware or cabinet doors, reattach them after the wrap is fully applied and trimmed.
Key Differences
- Preparation: Vinyl wrapping requires less intensive preparation. There's no need for sanding or priming; a thorough cleaning is usually sufficient.
- Application: Applying vinyl is a relatively quick process that doesn't involve multiple coats or drying times. While painting or staining can take several days to complete due to drying and curing times, vinyl wrapping can often be completed in a single day, depending on the size and complexity of the job.
- Finish and Aesthetics: Vinyl wraps offer a wide range of finishes not achievable with paint or stain, including textured and metallic effects. While paint and stain can significantly alter the look of your cabinets, vinyl wrapping opens up possibilities for more dramatic transformations.
- Mess and Fumes: Vinyl wrapping is a cleaner process with no risk of drips, spills, or fumes. Painting and staining involve potentially hazardous chemicals and require good ventilation.
- Durability and Maintenance: Both options can be durable when properly applied, but vinyl wraps are easier to change if you decide on a different look in the future. Painted and stained surfaces may require more maintenance over time, such as touch-ups for chips or scratches.
- Cost: Vinyl wrapping can be more cost-effective, especially if you're considering the expense of high-quality paints or stains and the potential need for professional application. Vinyl also offers the advantage of being a DIY-friendly option without requiring specialized painting skills.
In summary, vinyl wrapping provides a modern, efficient, and versatile alternative to traditional cabinet refinishing methods. It's ideal for those looking to update their cabinets with minimal fuss, expense, and time commitment.
Let's talk numbers. Traditional cabinet refinishing methods can burn a hole in your pocket. There's the cost of materials like primer, paint, and topcoats, not to mention the labor if you're not doing it yourself. And before you even get to the fun part, there's a whole lot of prep work involved — cleaning, sanding, priming... the list goes on.
Vinyl cabinet wraps, on the other hand, streamline the entire process. The preparation is minimal, with no need for sanding or priming, and you can forget about waiting days for paint to dry. The cost benefits are just as impressive. When you choose vinyl wraps, you're looking at a significantly lower material cost, with the added bonus of potentially increasing your home's value with a high-end finish.
Explore Rvinyl's Extensive Offerings
This is where Rvinyl enters the picture. As a frontrunner in the vinyl wrapping industry, we're proud to offer an extensive collection of cabinet wraps that cater to every taste and design preference. Our commitment to quality means that every product in our catalog is designed to not only look great but also withstand the test of time. Whether you're aiming for a minimalist aesthetic or a bold, statement-making look, Rvinyl has something for you.
The Sustainable Choice
Choosing vinyl wraps isn't just good for your wallet and your weekend schedule; it's also a step towards more sustainable living. By opting to reface rather than replace, you're reducing waste and conserving the resources that would have been used in manufacturing new cabinets.
Embrace the Future of Home Improvement
If you're ready to give your cabinets a facelift without the drawbacks of traditional refinishing methods, vinyl wraps are the way to go. With Rvinyl, transforming your space is easier, faster, and more affordable than ever before. Dive into our wide range of options and discover how simple it is to bring a fresh, modern look into your home.
Vinyl cabinet wraps are more than just a trend; they're a smart, practical solution for anyone looking to update their home. Join the revolution and see for yourself why more and more homeowners are choosing vinyl wraps over paint. Welcome to the future of home improvement.
Ready to transform your cabinets?
Explore our selection and start your renovation journey today. Happy wrapping!