
How to Wrap Your Side Markers with Rtint™
Rtint™ Side Marker Wraps are the
perfect way to add a touch of smoked sophistication to your ride's side
reflectors. Made using special air-release technology, you get bubble free
results and incredible tensile strength so you can wrap this Rtint™
Blackout film over crazy creases and incredible curves with ease. So, without
further ado, let's get to it and cover all six steps of wrapping your marker
reflectors:
"This is Phil from our vinyl on today I'm going to show you how to smoke your lights using Rtint, bubble-free wrap."

Step 1: Clean and Prepare Your Side Marker
"Before you begin make sure that your light has been properly cleaned. We recommend using
Rapid Prep or any other suitable cleaning solution that you know is it going
to damage your light or the adhesive backing."
It's definitely possible that you'd be able to install your Side Marker Tint
without using
- Lint-Free Cloth or Micro-Fiber Towel
- Degreaser or Rapid Prep
- Isopropyl Alcohol
- Water
- Exacto Blade
- Hard Card or Squeegee
Clean not only the reflector itself but the area surrounding the tail light too.
Because static electricity is created when the tint is removed from the liner
any dust and debris will be pulled onto the adhesive side of the tint. So,
clean, clean and then clean again!

Step 2: Determine the Sheet Size Needed
Technically, you should have measured your side marker reflector before you
made your purchase but, since almost all of these reflectors are less than a
foot long and twelve inches is our smallest smoked wrap size, you should be
fine. Determine how much of the sheet you'll need and cut it down to leave about
two inches around the side marker.

Step 3: Apply Tint to Side Marker Reflectors
"Align the film to one edge of your life and gently tack it into
position."
Begin by tacking down the film to one side of the reflector and work towards
the opposite side. Side markers are one of the easiest parts of a vehicle to
tint so don't rush it.

Step 4: Apply Tint Wrap Using Even Pressure
"Apply the tint slowly and carefully avoid large sweeping motions
that may wrinkle the film. If you do get a wrinkle something lift the film.
"

Step 5: Apply Heat and Trim
"Apply a little heat and the wrinkles should come out. The film can
now be trimmed with a razor or craft knife. Carefully and slowly remove the
trim film."
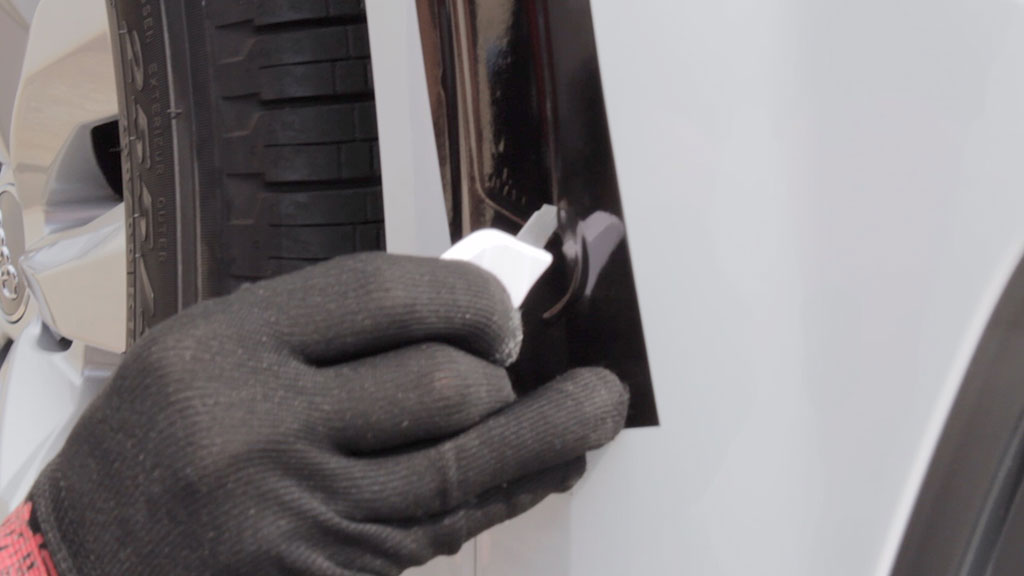
Step 6: Trim Away Excess
Continue to trim any excess or
over-stretched film away. Any bubbles that form and remain for more than 24
hours may be popped with a pin.
"Apply the finishing touches and get ready to ride. If you like what
you just saw give us a thumbs up but please don't forget to subscribe to our
channel for more great install and DIY videos."
Recap: Rtint™ Side Marker Tint Wrap Installation in 6 Steps
- Prepare and clean
- Measure wrap size required
- Remove liner
and tack on tint
- Squeegee on tints
- Heat the tints
- Trim away excess
And, you're done! That's all there is to it. Check out the video version
below and be sure to leave a moment and give thumbs up!