How to Wrap Your Hood
If you've ever wanted to customize your Hood with a unique color or pattern to stand out on the road, then Rvinyl has got you covered. Completely change the look and feel of your ride with a premium quality wrap from Rwraps, 3M, Avery Dennison or ORAFOL.
We've also decided to team up with Justin Pate from the Wrap Institute to show us how
to precisely wrap your Hood so you achieve professional level results. Check out the full video below and then keep scrolling to get a step by
step guide and tips to make your purchase and installation smooth. You will want to assemble the following
tools prior to before buying film.
Jump to:
How to Wrap Your Hood
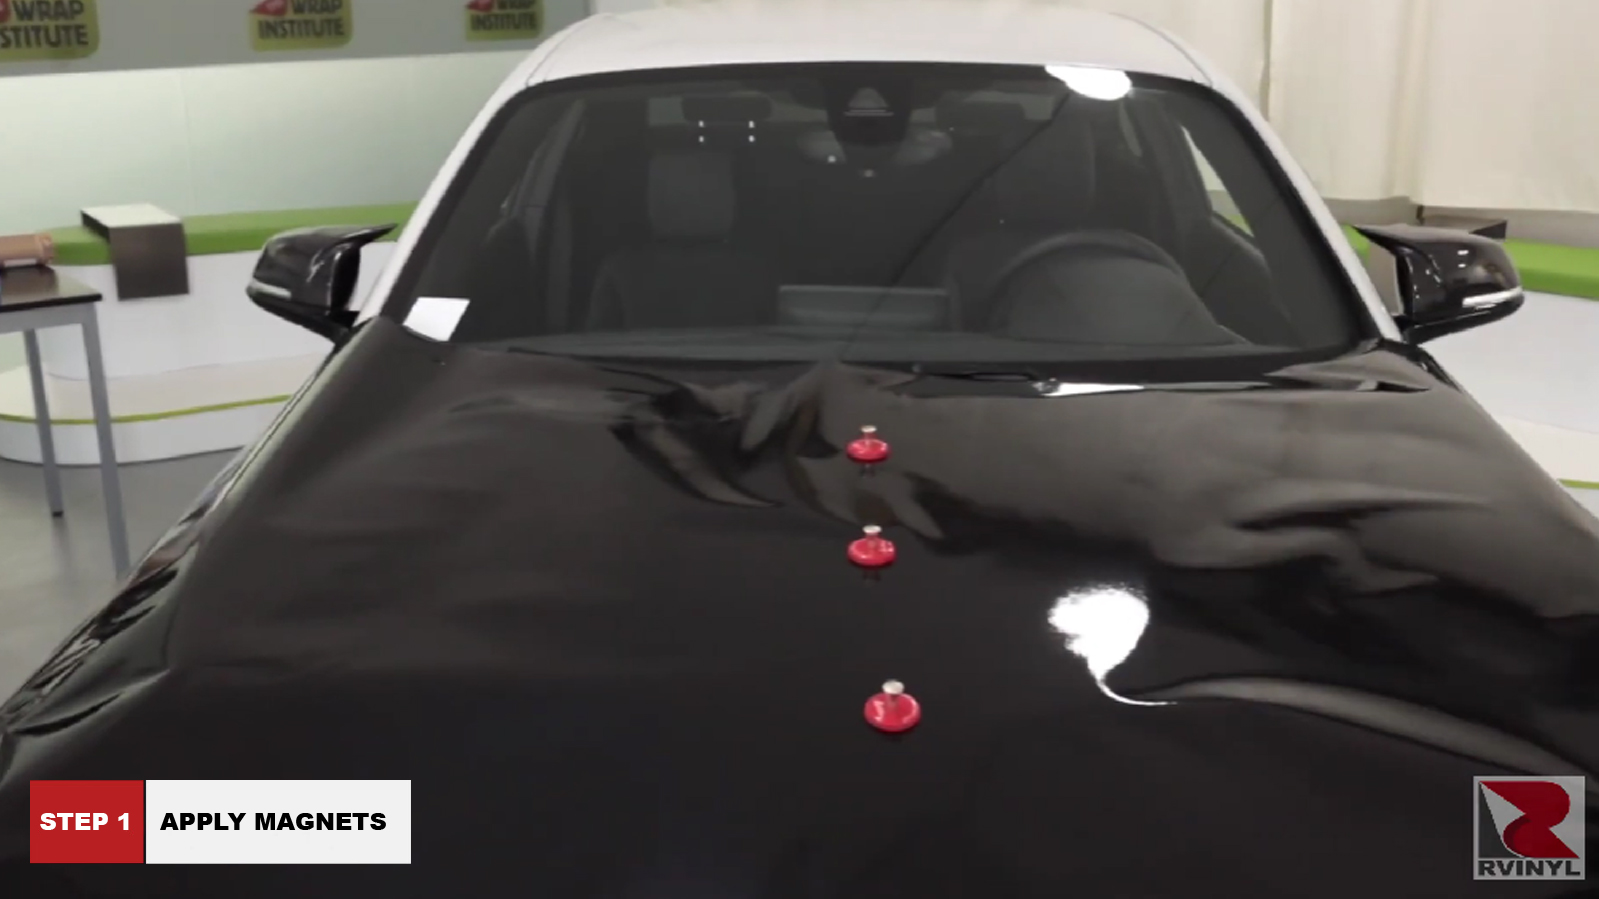
Step 1: Apply Magnets
The first step is to open up the panel on the hood and remove excess material
at the top, this will make the installation much easier. Next place, magnets
directly in the middle. This is called a temporary hinch.
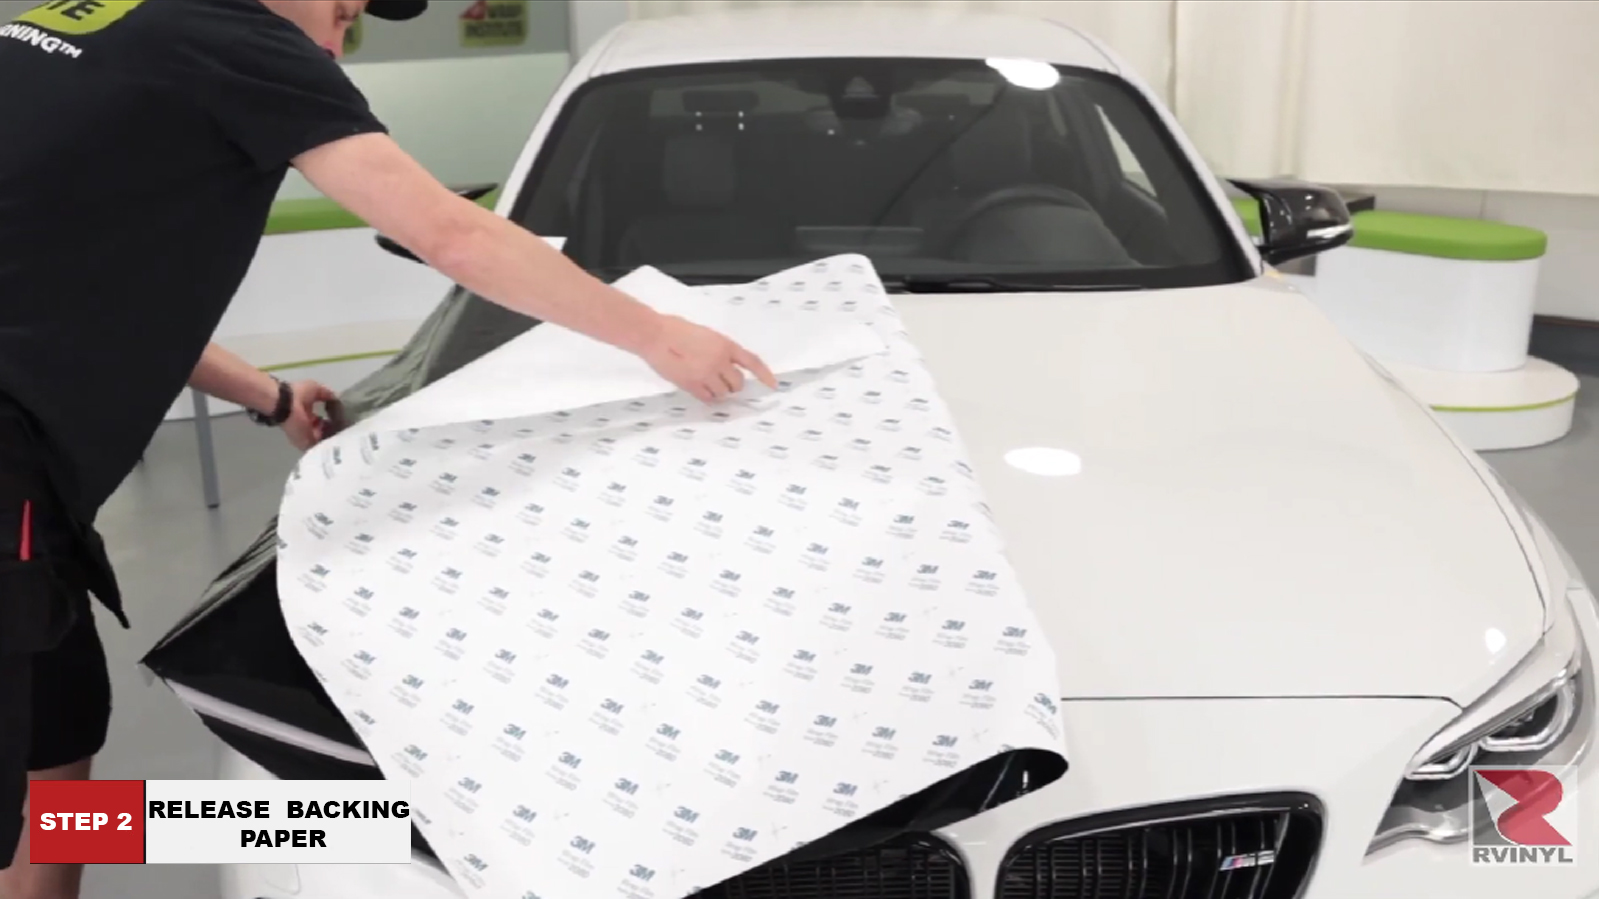
Step 2: Release Backing Paper
Flip the panel over, then release the backing paper. Make sure that the
adhesive side is facing up and doesn't fold on itself. Once pulled halfway, cut
the backing people away with scissors, flip the panel over carefully so it
doesn't fold on itself, then lightly lay the panel to even out the wrinkles.
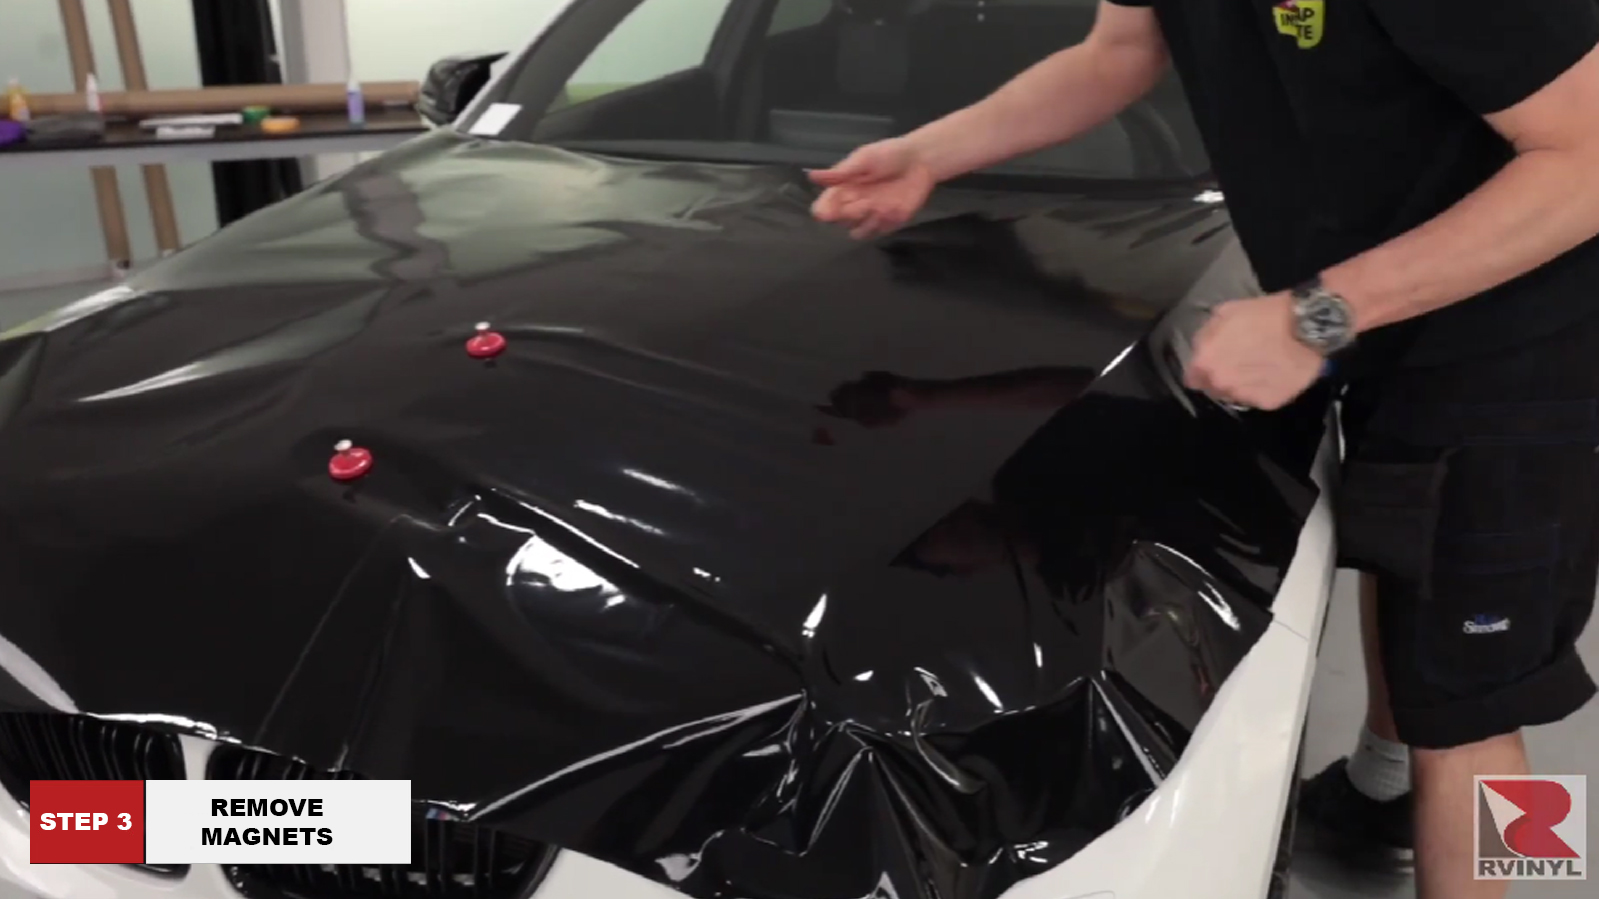
Step 3: Remove Magnets
The next step is to remove the magnets. Once the magnets are removed with the
free hand on the backing paper side, push the material so it goes fully glass or
no wrinkle and lock the panel onto the surface with one squeegee stroke or
lightly towards the front and continue the squeegee stroke as far as possible
before wrinkles begin.
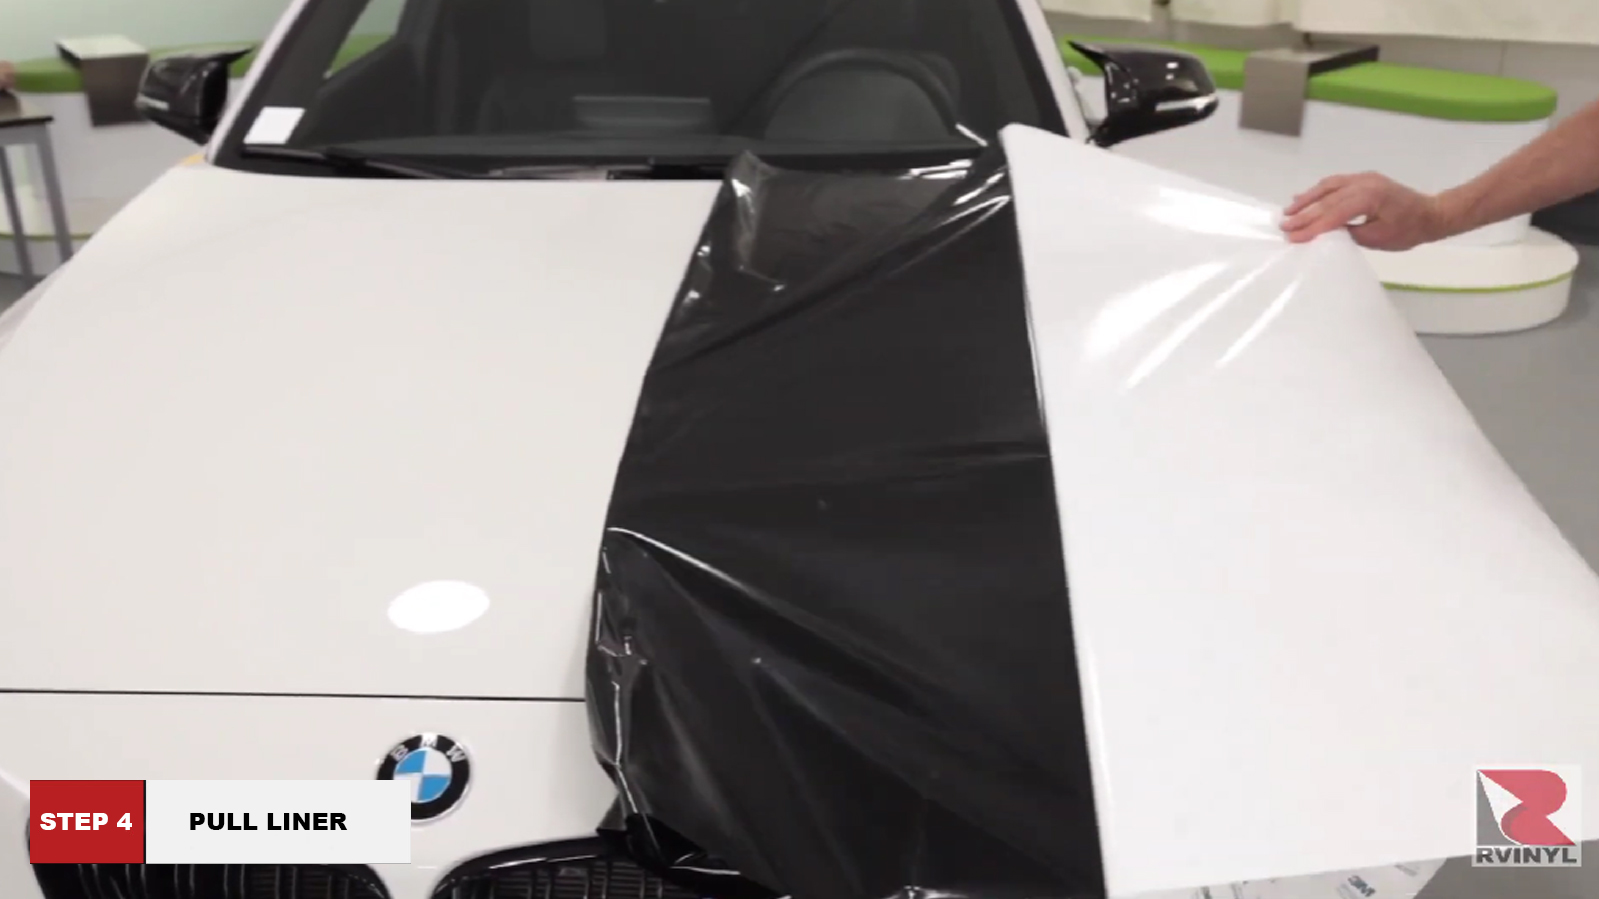
Step 4: Pull Liner
Then once the body line is set, do the other half of the head, first before
taking the film to the outside edge. Keep the liner on as it's flipped over,
then release the entire liner and for safety, always place the liner underneath
the vehicle. Pull towards either corner, just like for the first half, this will
remove all the wrinkles on the film. Make sure all the wrinkles are pulled nice
and even towards the front. Once there are no wrinkles on the surface, simply
squeegee the material on the hood in the same manner.
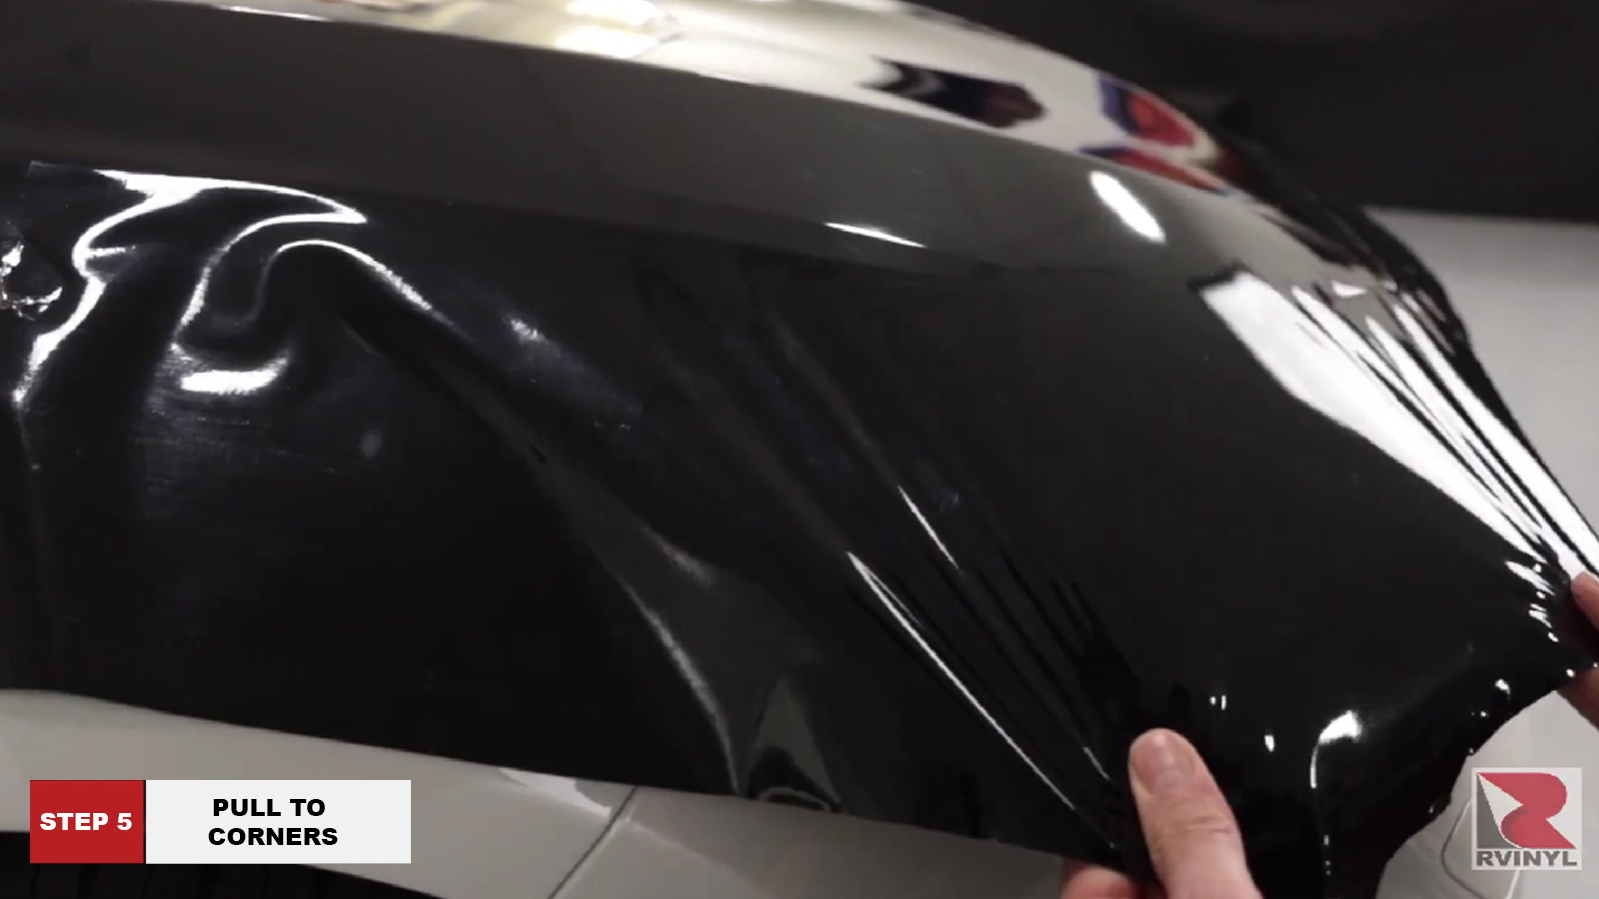
Step 5: Pull to Corners
For the sides, simply pull nice and firm to the front corner and then pull
nice and firm to the upper corner. This will even out the material and then it
could be squeegeed towards the side. Always make sure you do a long horizontal
stroke and then run a finger on the edge to seal the edge, so it's set up for
cutting.

Step 6: Remove Cap Sheet
There may be scratches on the surface and depending on the vinyl that was
chosen in this case, 3M 2080. It does come with a cap sheet. Take masking tape
to loosen the cap sheet from the film and then pull the cap sheet off, the
scratches were on the cap sheet and not on the hood material.
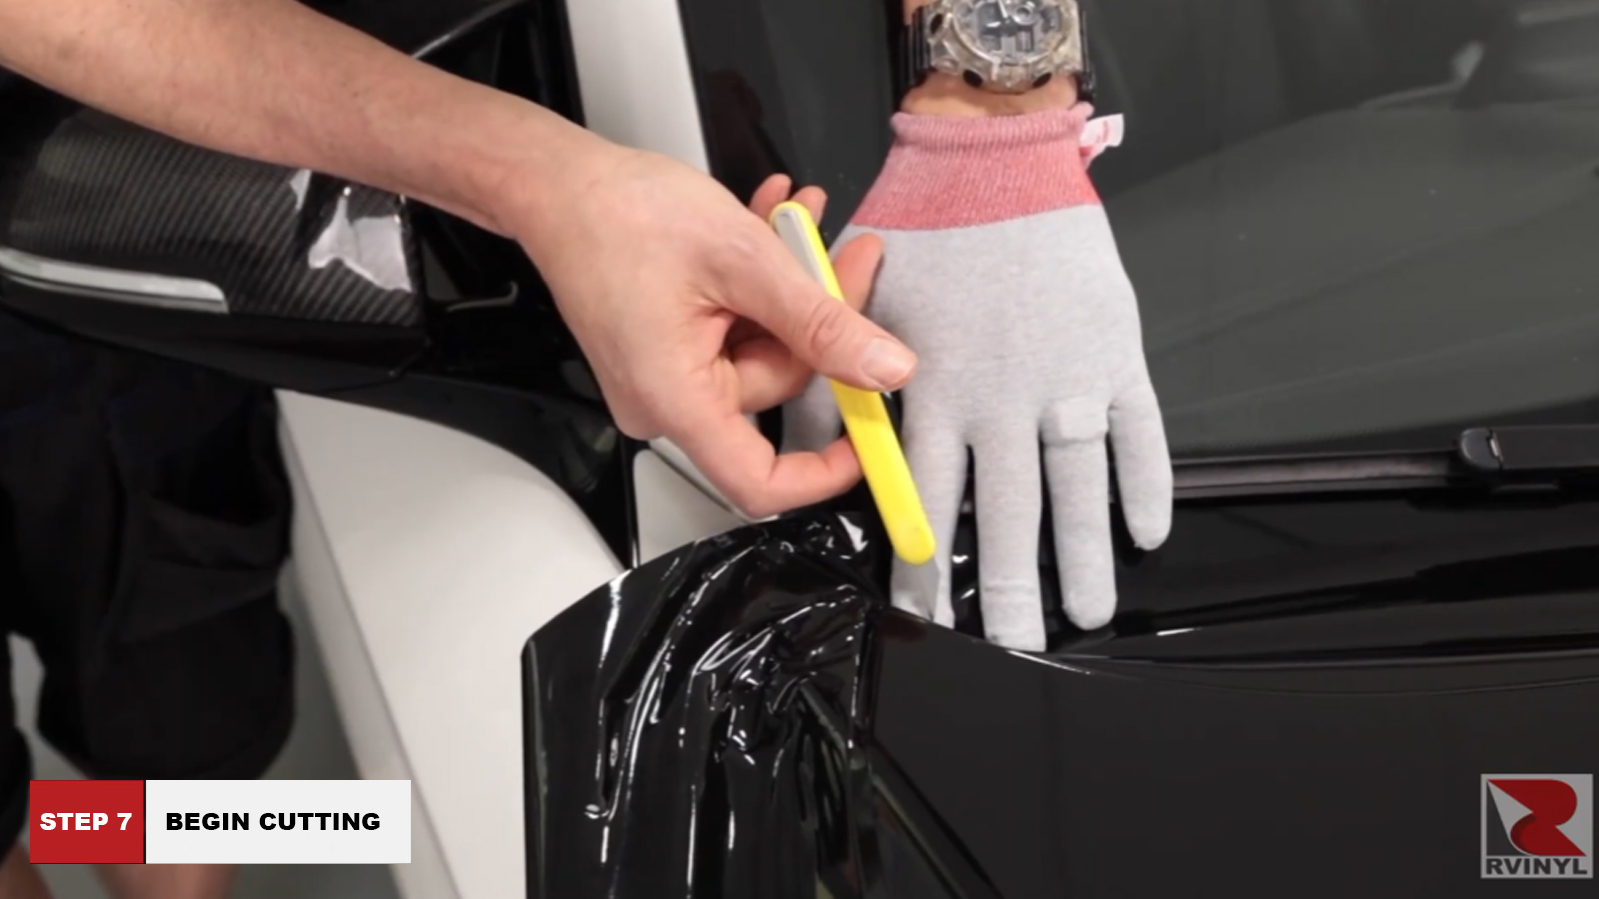
Step 7: Begin Cutting
Now, that the materials are in perfect condition and cutting can begin. The
corners should always be done first. Pick the material up from the outside edge.
Add heat to soften the material around the corner and keep the material from
touching the opposite side, tuck it behind the corner. This will get full
coverage, run a finger on one edge to round the material, cut the corner first.
Roughly one inch on either side.

Step 8: Cut Opposite Sides
Once the corner is cut, then the flat edge can be cut towards the corner.
Here the materials are cut on the opposite side, the Fender side, which gives
one-quarter of an inch of material that will be wrapped around underneath the
hood. This will ensure full coverage and hold.
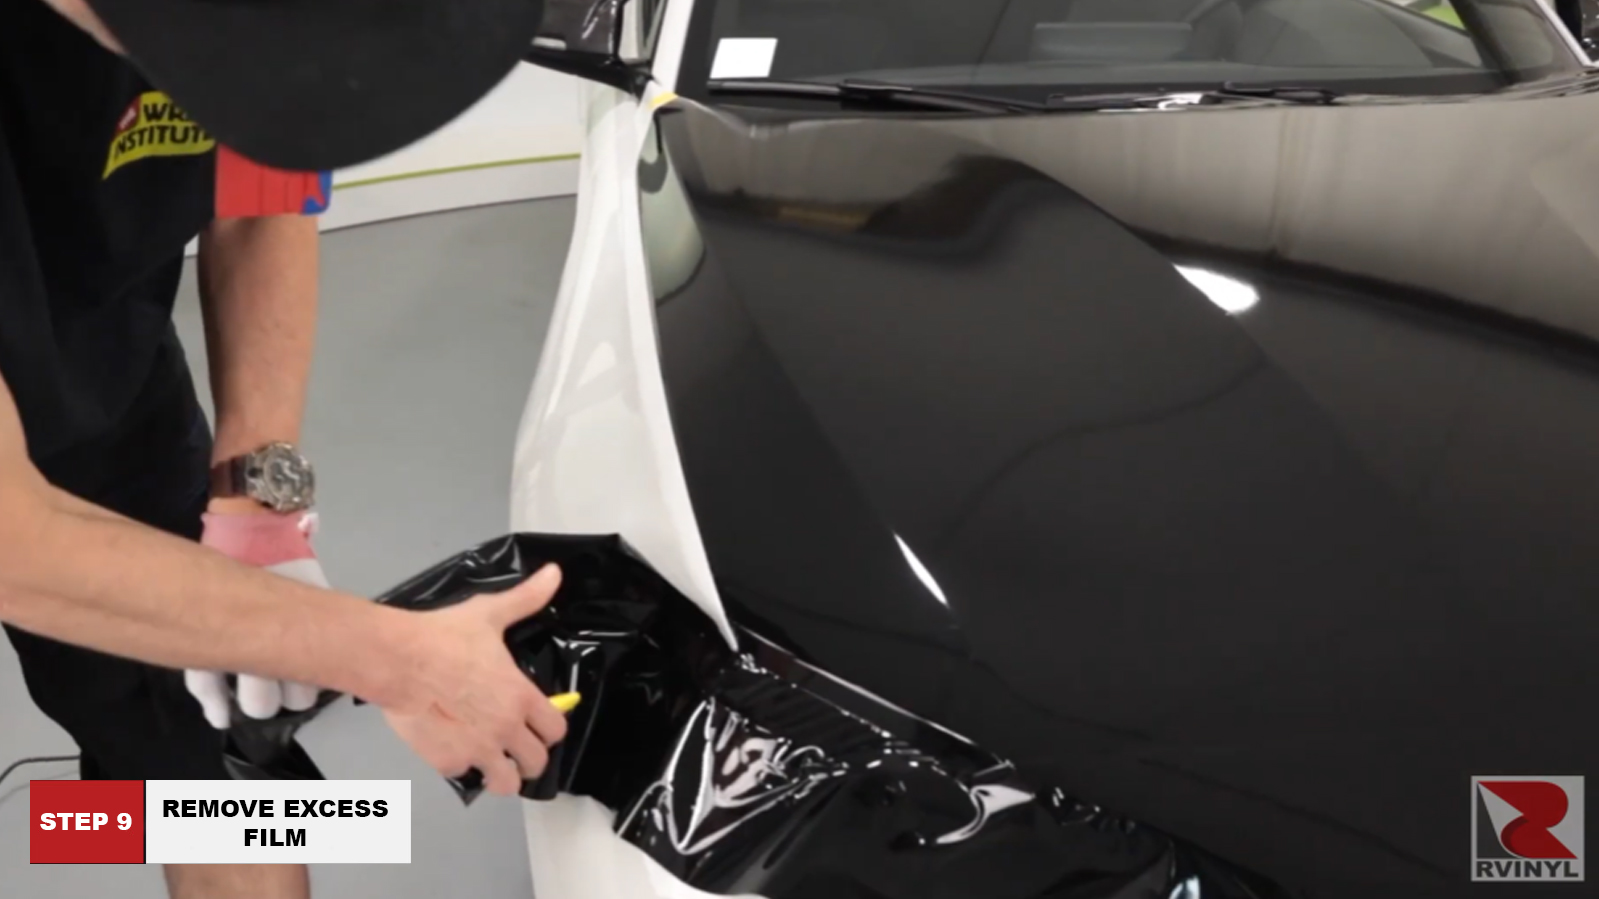
Step 9: Remove Excess Film
Remove the excess film point away from the hood, and once the excess film has
been removed, add heat to soften the film and squeegee it under the corner. And
if there are any body lines first.
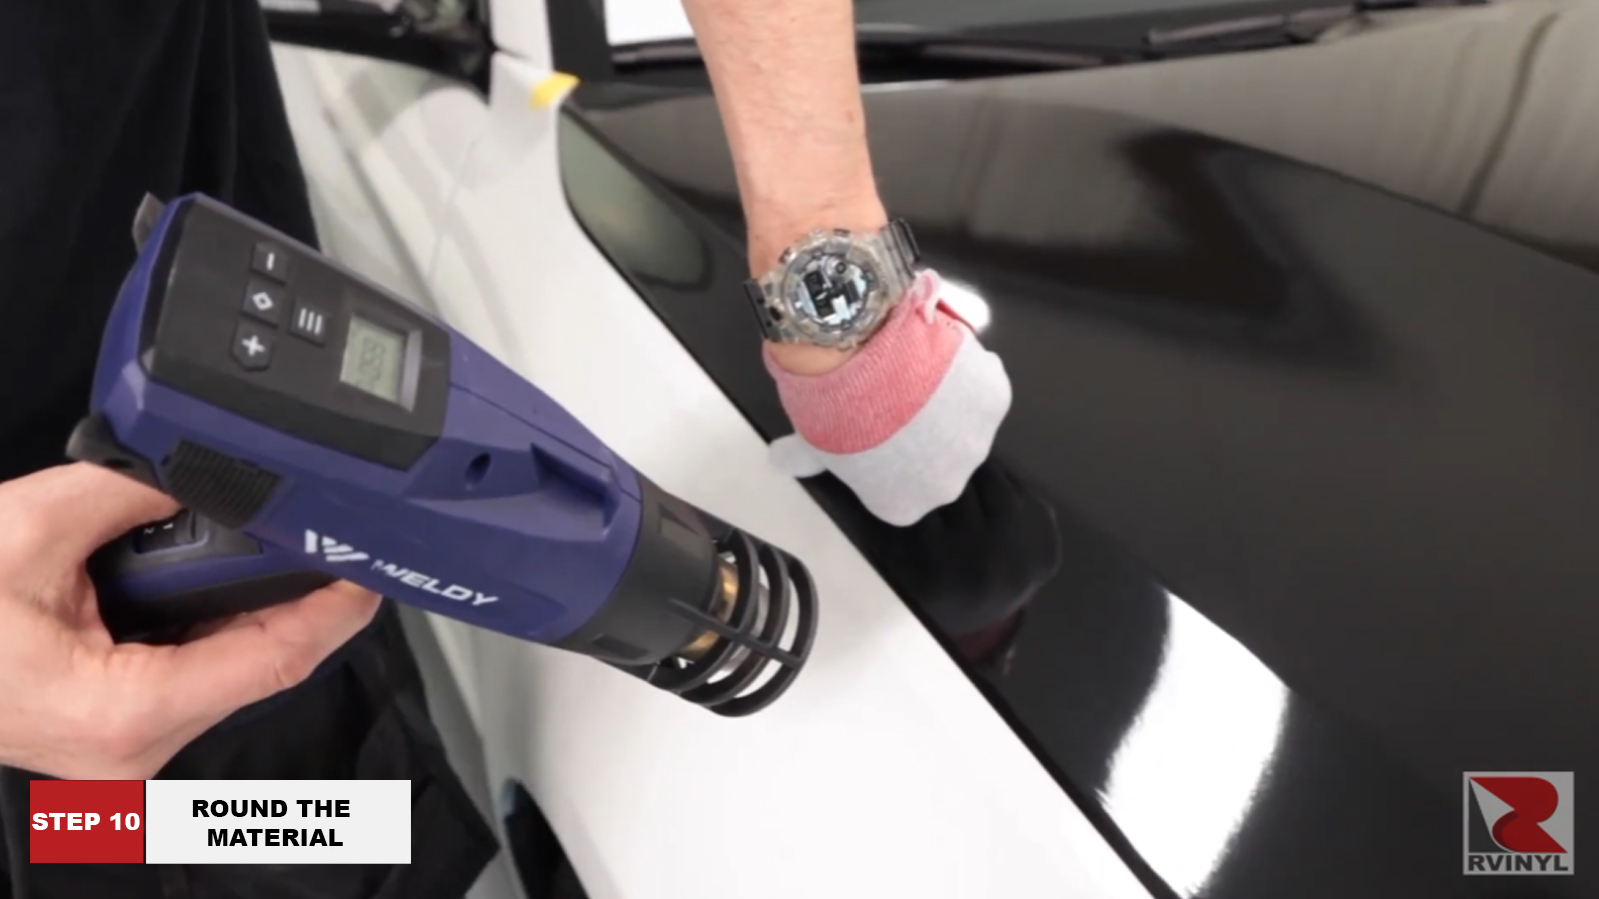
Step 10: Round the Material
Once the corner and bodyline are done, then using an application glove, round
the material behind the edge with heat, softening the film, and with the sides
done for the front cut on the bumper side, this will allow a one-quarter inch of
film to be wrapped underneath the front of the hood. Always be sure to lift the
film high and away from the vehicle, so that when cutting the excess film,
there's no chance of the blade damaging the vehicle.
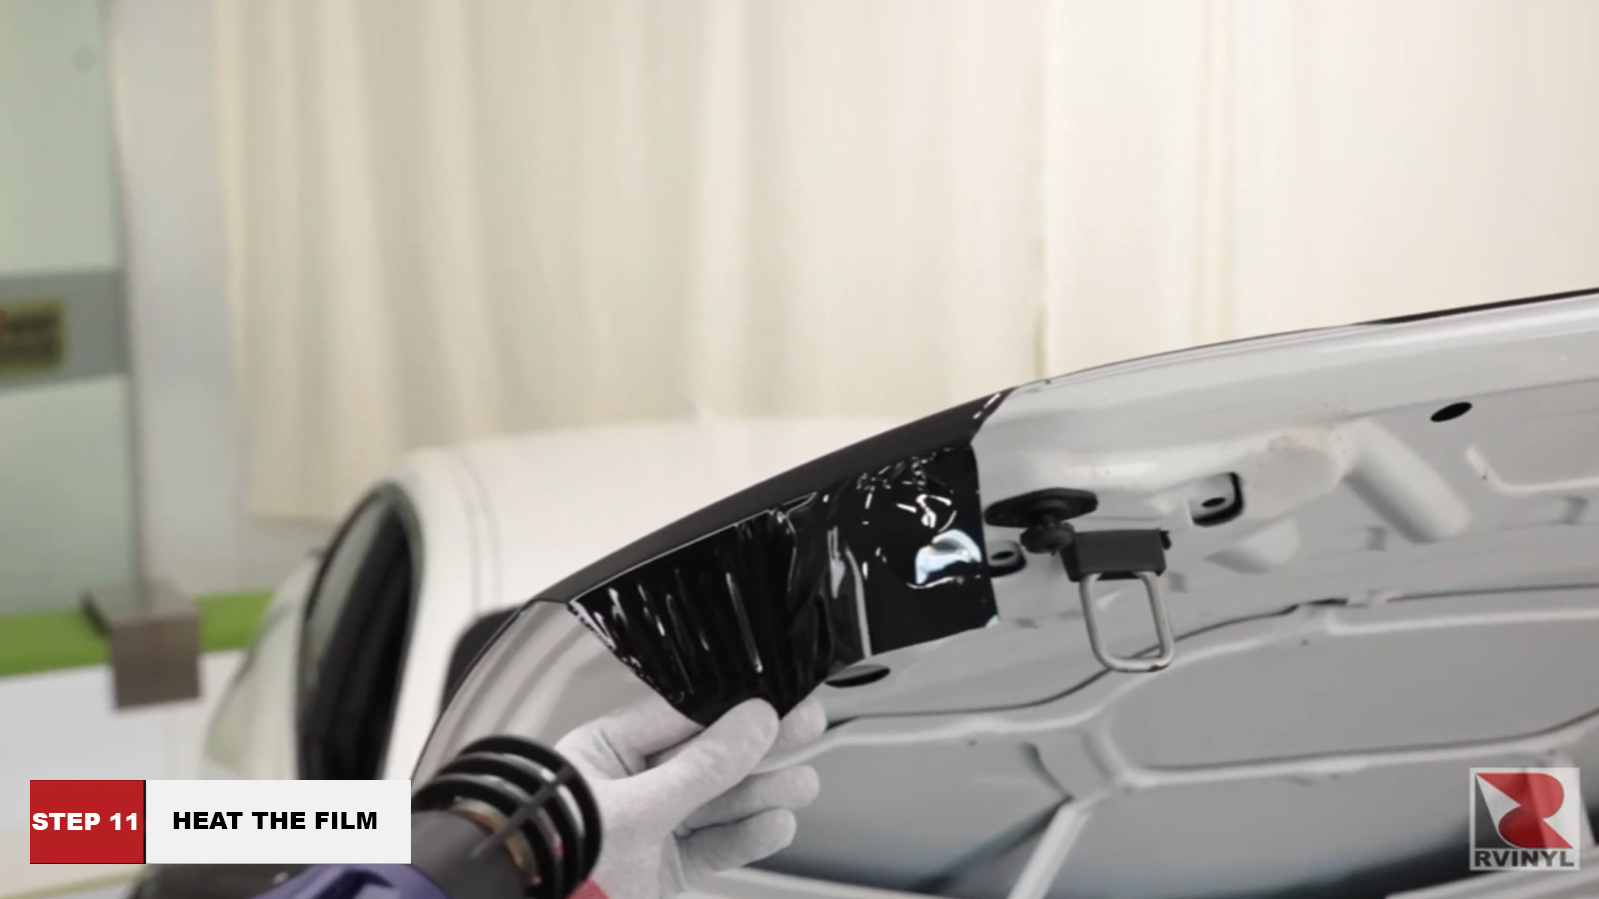
Step 11: Heat the Film
Once all the excess film has been removed, open the hood slightly, and run a
finger to round the material at the front before fully grabbing it, this will
avoid the material folding on itself. And if there's any excess film like here
on the front corner, add heat to soften the film and always form the corners.
First, use the application glove to round the film in these areas. Once the film
is rounded, the material can be cut flush to the side of the hood. For body
angles at the upper section add heat to soften the film so it doesn't wrinkle
then form it in with the application glove or squeegee.
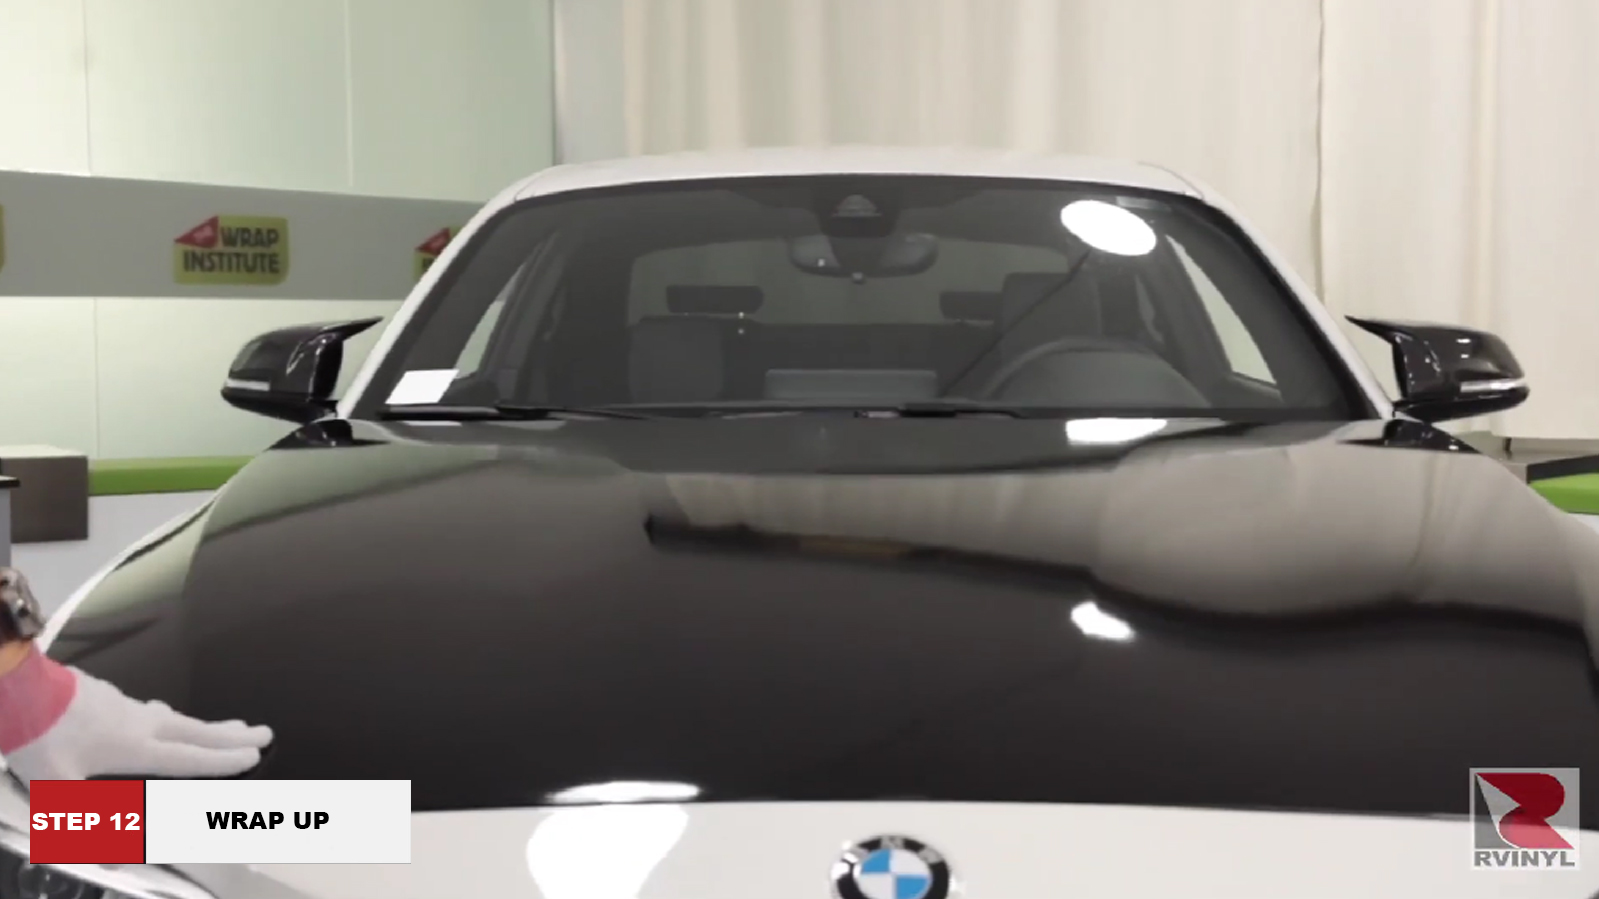
Step 12: Wrap Up
Once the front is done, then simply just go around all the edges with heat to
make sure the film has fully wrapped around and sealed for a long-term hold.